Standard map
Blackheart's Bay
- Not in ranked pool
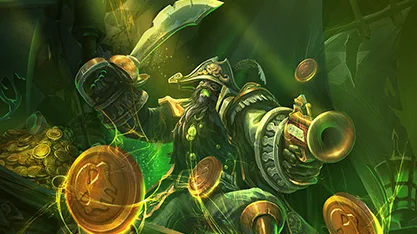
Gather doubloons from chests, camps and fallen heroes and hand them in at the ghost ship, which then fires on enemy forts.
- Size
- Large
- Lanes
- 3
- Ranked list
- Hand-checked
Best heroes on Blackheart's Bay
Heroes on Blackheart's Bay
Score 1–100 from how the kit fits this map (50 = neutral)
-
Why? 4
- TheoryAbathur's map-wide reach offsets Blackheart's Bay's long rotations.
- TheoryAbathur can siege structures (Locust Strain, Slapathur), which adds to Blackheart's Bay's objective pressure.
- TheoryBlackheart's Bay has three lanes for Abathur to pressure while the team holds the objective.
- TheoryAbathur can reach channelling enemies quickly to contest Blackheart's Bay's objective.
-
Why? 4
- TheoryAzmodan's map-wide reach (Demon Lieutenant) offsets Blackheart's Bay's long rotations.
- TheoryAzmodan can siege structures (Siegebreaker), which adds to Blackheart's Bay's objective pressure.
- TheoryAzmodan has little mobility to rotate across Blackheart's Bay's large layout.
- TheoryAzmodan can reach channelling enemies quickly (Demon Lieutenant) to contest Blackheart's Bay's objective.
-
Why? 4
- TheoryBrightwing's map-wide reach offsets Blackheart's Bay's long rotations.
- TheoryBrightwing can reach channelling enemies quickly to contest Blackheart's Bay's objective.
- TheoryBrightwing can cover ground quickly (Phase Shift, Blink Heal) on Blackheart's Bay's large layout.
- TheoryBrightwing's silence (Polymorph, Hush!) stops enemies channelling Blackheart's Bay's objective.
-
Why? 4
- TheoryDehaka's map-wide reach (Brushstalker) offsets Blackheart's Bay's long rotations.
- TheoryBlackheart's Bay has three lanes for Dehaka to pressure while the team holds the objective.
- TheoryDehaka can reach channelling enemies quickly (Brushstalker) to contest Blackheart's Bay's objective.
- TheoryDehaka can cover ground quickly (Brushstalker, Tunneling Claws) on Blackheart's Bay's large layout.
-
Why? 4
- TheoryBlackheart's Bay has three lanes for Sylvanas to pressure while the team holds the objective.
- TheorySylvanas can reach channelling enemies quickly (Haunting Wave, Windrunner) to contest Blackheart's Bay's objective.
- TheorySylvanas can cover ground quickly (Haunting Wave, Windrunner) on Blackheart's Bay's large layout.
- TheorySylvanas's silence (Wailing Arrow, Mind Control) stops enemies channelling Blackheart's Bay's objective.
-
Why? 3
- TheoryFalstad's map-wide reach (Flight) offsets Blackheart's Bay's long rotations.
- TheoryFalstad can reach channelling enemies quickly (Flight) to contest Blackheart's Bay's objective.
- TheoryFalstad's waveclear (Lightning Rod) helps hold lanes against Blackheart's Bay's pushing objective.
-
Why? 3
- TheoryRagnaros's map-wide reach (Molten Core, Heroic Difficulty) offsets Blackheart's Bay's long rotations.
- TheoryRagnaros can reach channelling enemies quickly (Molten Core, Heroic Difficulty) to contest Blackheart's Bay's objective.
- TheoryRagnaros's waveclear (Empower Sulfuras, Blast Wave) helps hold lanes against Blackheart's Bay's pushing objective.
-
Why? 4
- TheoryFenix's map-wide reach (Planet Cracker) offsets Blackheart's Bay's long rotations. Only when Fenix takes Planet Cracker.
- TheoryFenix can reach channelling enemies quickly (Warp) to contest Blackheart's Bay's objective.
- TheoryFenix can cover ground quickly (Warp) on Blackheart's Bay's large layout.
- TheoryFenix's waveclear (Plasma Cutter, Weapon Mode: Repeater Cannon) helps hold lanes against Blackheart's Bay's pushing objective.








View 62 more
- Samuro Score 71 Theory Blackheart's Bay has three lanes for Samuro to pressure while the team holds the objective.
2 more reasons
- Samuro can reach channelling enemies quickly (Wind Walk) to contest Blackheart's Bay's objective.
- Samuro can cover ground quickly (Mirror Image, Shukuchi) on Blackheart's Bay's large layout.
- Tyrande Score 71 Theory Tyrande's map-wide reach offsets Blackheart's Bay's long rotations.
1 more reason
- Tyrande can reach channelling enemies quickly to contest Blackheart's Bay's objective.
- Valeera Score 71 Theory Valeera can reach channelling enemies quickly (Vanish) to contest Blackheart's Bay's objective.
3 more reasons
- Valeera can cover ground quickly (Vanish, Subtlety) on Blackheart's Bay's large layout.
- Valeera's silence (Eviscerate) stops enemies channelling Blackheart's Bay's objective.
- Valeera's waveclear (Sinister Strike, Blade Flurry) helps hold lanes against Blackheart's Bay's pushing objective.
- Sgt. Hammer Score 70 Theory Sgt. Hammer can siege structures, which adds to Blackheart's Bay's objective pressure.
3 more reasons
- Sgt. Hammer's map-wide reach (Blunt Force Gun) offsets Blackheart's Bay's long rotations. Only when Sgt. Hammer takes Blunt Force Gun.
- Sgt. Hammer has little mobility to rotate across Blackheart's Bay's large layout.
- Sgt. Hammer's waveclear (Spider Mines, Concussive Blast) helps hold lanes against Blackheart's Bay's pushing objective.
- Hanzo Score 69 Theory Hanzo's map-wide reach (Dragon's Arrow) offsets Blackheart's Bay's long rotations. Only when Hanzo takes Dragon's Arrow.
3 more reasons
- Hanzo can reach channelling enemies quickly (Dragon's Arrow) to contest Blackheart's Bay's objective. Only when Hanzo takes Dragon's Arrow.
- Hanzo can cover ground quickly (Play of the Game) on Blackheart's Bay's large layout. Only when Hanzo takes Play of the Game.
- Hanzo's waveclear (Serrated Arrows, Ignore All Distractions) helps hold lanes against Blackheart's Bay's pushing objective. Only when Hanzo takes Serrated Arrows or Ignore All Distractions.
- Mephisto Score 69 Theory Mephisto can reach channelling enemies quickly (Shade of Mephisto, Shade Lord) to contest Blackheart's Bay's objective.
3 more reasons
- Mephisto can cover ground quickly (Shade of Mephisto, Shade Lord) on Blackheart's Bay's large layout.
- Mephisto's waveclear (Skull Missile, Shade of Mephisto) helps hold lanes against Blackheart's Bay's pushing objective.
- Mephisto's silence (Unspeakable Horror) stops enemies channelling Blackheart's Bay's objective. Only when Mephisto takes Unspeakable Horror.
- Murky Score 69 Theory Murky can siege structures (Pufferfish, Never-Ending Murlocs), which adds to Blackheart's Bay's objective pressure.
1 more reason
- Blackheart's Bay has three lanes for Murky to pressure while the team holds the objective.
- Xal'atath Score 69 Theory Xal'atath can reach channelling enemies quickly (Void Step, Cloak of Shadows) to contest Blackheart's Bay's objective.
3 more reasons
- Xal'atath can cover ground quickly (Void Step, Cloak of Shadows) on Blackheart's Bay's large layout.
- Xal'atath's waveclear (Shadow Mark, Dark Heart Ritual) helps hold lanes against Blackheart's Bay's pushing objective.
- Xal'atath's silence (Silence of the Lamb, Dark Heart's Protection) stops enemies channelling Blackheart's Bay's objective. Only when Xal'atath takes Silence of the Lamb or Dark Heart's Protection.
- Tyrael Score 67 Theory Tyrael can reach channelling enemies quickly (El'druin's Might, Stalwart Angel) to contest Blackheart's Bay's objective.
2 more reasons
- Tyrael can cover ground quickly (El'druin's Might, Stalwart Angel) on Blackheart's Bay's large layout.
- Tyrael's waveclear (El'druin's Might, Smite) helps hold lanes against Blackheart's Bay's pushing objective.
- Diablo Score 66 Theory Diablo's map-wide reach (Apocalypse) offsets Blackheart's Bay's long rotations. Only when Diablo takes Apocalypse.
2 more reasons
- Diablo can reach channelling enemies quickly (Apocalypse) to contest Blackheart's Bay's objective. Only when Diablo takes Apocalypse.
- Diablo can cover ground quickly (Hellgate) on Blackheart's Bay's large layout. Only when Diablo takes Hellgate.
- Cho'gall Score 65 Theory Cho'gall's waveclear (Shadowflame, Dread Orb) helps hold lanes against Blackheart's Bay's pushing objective.
3 more reasons
- Cho'gall can reach channelling enemies quickly (Shifting Nether) to contest Blackheart's Bay's objective. Only when Cho'gall takes Shifting Nether.
- Cho'gall can cover ground quickly (Shifting Nether) on Blackheart's Bay's large layout. Only when Cho'gall takes Shifting Nether.
- Cho'gall's silence (Deafening Blast) stops enemies channelling Blackheart's Bay's objective. Only when Cho'gall takes Deafening Blast.
- Deathwing Score 65 Theory Deathwing can siege structures (Cataclysm), which adds to Blackheart's Bay's objective pressure.
1 more reason
- Deathwing's waveclear (Incinerate, Onslaught) helps hold lanes against Blackheart's Bay's pushing objective.
- Medivh Score 65 Theory Medivh can reach channelling enemies quickly (Portal) to contest Blackheart's Bay's objective.
2 more reasons
- Medivh can cover ground quickly (Portal) on Blackheart's Bay's large layout.
- Medivh's silence (Poly Bomb) stops enemies channelling Blackheart's Bay's objective. Only when Medivh takes Poly Bomb.
- Probius Score 65 Theory Probius can siege structures, which adds to Blackheart's Bay's objective pressure.
1 more reason
- Probius's waveclear (Disruption Pulse, Warp Rift) helps hold lanes against Blackheart's Bay's pushing objective.
- Xul Score 65 Theory Blackheart's Bay has three lanes for Xul to pressure while the team holds the objective.
1 more reason
- Xul's waveclear (Spectral Scythe, Cursed Strikes) helps hold lanes against Blackheart's Bay's pushing objective.
- Zagara Score 65 Theory Zagara can siege structures, which adds to Blackheart's Bay's objective pressure.
1 more reason
- Zagara's waveclear (Baneling Barrage, Infested Drop) helps hold lanes against Blackheart's Bay's pushing objective.
- Zeratul Score 65 Theory Zeratul can reach channelling enemies quickly (Permanent Cloak) to contest Blackheart's Bay's objective.
2 more reasons
- Zeratul can cover ground quickly (Blink, Vorpal Blade) on Blackheart's Bay's large layout.
- Zeratul's Time Stop (Void Prison) stops enemies channelling Blackheart's Bay's objective. Only when Zeratul takes Void Prison.
- The Lost Vikings Score 64 Theory Blackheart's Bay has three lanes for The Lost Vikings to pressure while the team holds the objective.
1 more reason
- The Lost Vikings can reach channelling enemies quickly (Spy Games) to contest Blackheart's Bay's objective. Only when The Lost Vikings takes Spy Games.
- Alarak Score 62 Theory Alarak's silence (Discord Strike, Dissonance) stops enemies channelling Blackheart's Bay's objective.
2 more reasons
- Alarak can reach channelling enemies quickly (Last Laugh) to contest Blackheart's Bay's objective. Only when Alarak takes Last Laugh.
- Alarak can cover ground quickly (Last Laugh) on Blackheart's Bay's large layout. Only when Alarak takes Last Laugh.
- Anub'arak Score 62 Theory Anub'arak can reach channelling enemies quickly (Burrow Charge) to contest Blackheart's Bay's objective.
1 more reason
- Anub'arak can cover ground quickly (Burrow Charge) on Blackheart's Bay's large layout.
- E.T.C. Score 62 Theory E.T.C.'s waveclear (Powerslide, Face Melt) helps hold lanes against Blackheart's Bay's pushing objective.
2 more reasons
- E.T.C. can reach channelling enemies quickly (Ride the Lightning) to contest Blackheart's Bay's objective. Only when E.T.C. takes Ride the Lightning.
- E.T.C. can cover ground quickly (Ride the Lightning) on Blackheart's Bay's large layout. Only when E.T.C. takes Ride the Lightning.
- Kerrigan Score 62 Theory Kerrigan's waveclear (Impaling Blades, Primal Grasp) helps hold lanes against Blackheart's Bay's pushing objective.
2 more reasons
- Kerrigan can reach channelling enemies quickly (Psionic Shift) to contest Blackheart's Bay's objective. Only when Kerrigan takes Psionic Shift.
- Kerrigan can cover ground quickly (Psionic Shift) on Blackheart's Bay's large layout. Only when Kerrigan takes Psionic Shift.
- Li-Ming Score 62 Theory Li-Ming can reach channelling enemies quickly (Teleport, Aether Walker) to contest Blackheart's Bay's objective.
1 more reason
- Li-Ming can cover ground quickly (Teleport, Aether Walker) on Blackheart's Bay's large layout.
- Malthael Score 62 Theory Malthael can reach channelling enemies quickly (Wraith Strike) to contest Blackheart's Bay's objective.
1 more reason
- Malthael can cover ground quickly (Wraith Strike) on Blackheart's Bay's large layout.
- Stitches Score 62 Theory Stitches's waveclear (Shambling Horror) helps hold lanes against Blackheart's Bay's pushing objective.
2 more reasons
- Stitches can reach channelling enemies quickly (Hungry Hungry Stitches) to contest Blackheart's Bay's objective. Only when Stitches takes Hungry Hungry Stitches.
- Stitches can cover ground quickly (Hungry Hungry Stitches) on Blackheart's Bay's large layout. Only when Stitches takes Hungry Hungry Stitches.
- Kel'Thuzad Score 61 Theory Kel'Thuzad's map-wide reach (Shadow Fissure) offsets Blackheart's Bay's long rotations. Only when Kel'Thuzad takes Shadow Fissure.
3 more reasons
- Kel'Thuzad has little mobility to rotate across Blackheart's Bay's large layout.
- Kel'Thuzad's waveclear (Death and Decay, Frost Nova) helps hold lanes against Blackheart's Bay's pushing objective.
- Kel'Thuzad can reach channelling enemies quickly (Shadow Fissure) to contest Blackheart's Bay's objective. Only when Kel'Thuzad takes Shadow Fissure.
- Mal'Ganis Score 60 Theory Mal'Ganis's sleep (Night Rush, Seeker Swarm) stops enemies channelling Blackheart's Bay's objective.
1 more reason
- Mal'Ganis's waveclear (Fel Claws, Necrotic Embrace) helps hold lanes against Blackheart's Bay's pushing objective.
- Malfurion Score 60 Theory Malfurion can reach channelling enemies quickly (Astral Communion) to contest Blackheart's Bay's objective. Only when Malfurion takes Astral Communion.
2 more reasons
- Malfurion can cover ground quickly (Astral Communion) on Blackheart's Bay's large layout. Only when Malfurion takes Astral Communion.
- Malfurion's silence (Twilight Dream, Astral Communion) stops enemies channelling Blackheart's Bay's objective. Only when Malfurion takes Twilight Dream or Astral Communion.
- The Butcher Score 60 Theory The Butcher can reach channelling enemies quickly (Bolt of the Storm) to contest Blackheart's Bay's objective. Only when The Butcher takes Bolt of the Storm.
2 more reasons
- The Butcher can cover ground quickly (Bolt of the Storm) on Blackheart's Bay's large layout. Only when The Butcher takes Bolt of the Storm.
- The Butcher's silence (Lamb to the Slaughter) stops enemies channelling Blackheart's Bay's objective. Only when The Butcher takes Lamb to the Slaughter.
- Cassia Score 58 Theory Cassia's waveclear (Lightning Fury, Blinding Light) helps hold lanes against Blackheart's Bay's pushing objective.
1 more reason
- Cassia's silence (Imprisoning Light) stops enemies channelling Blackheart's Bay's objective. Only when Cassia takes Imprisoning Light.
- Garrosh Score 58 Theory Garrosh's waveclear (Groundbreaker, Wrecking Ball) helps hold lanes against Blackheart's Bay's pushing objective.
1 more reason
- Garrosh's silence (Warlord's Challenge) stops enemies channelling Blackheart's Bay's objective. Only when Garrosh takes Warlord's Challenge.
- Junkrat Score 58 Theory Junkrat's waveclear (Frag Launcher, Concussion Mine) helps hold lanes against Blackheart's Bay's pushing objective.
1 more reason
- Junkrat's silence (Sticky Wicket) stops enemies channelling Blackheart's Bay's objective. Only when Junkrat takes Sticky Wicket.
- Leoric Score 58 Theory Leoric's waveclear (Skeletal Swing) helps hold lanes against Blackheart's Bay's pushing objective.
1 more reason
- Leoric's silence (Buried Alive) stops enemies channelling Blackheart's Bay's objective. Only when Leoric takes Buried Alive.
- Maiev Score 58 Theory Maiev's waveclear (Fan of Knives, Spirit of Vengeance) helps hold lanes against Blackheart's Bay's pushing objective.
1 more reason
- Maiev's silence (Containment Disc) stops enemies channelling Blackheart's Bay's objective. Only when Maiev takes Containment Disc.
- Qhira Score 58 Theory Qhira's waveclear (Carnage, Revolving Sweep) helps hold lanes against Blackheart's Bay's pushing objective.
1 more reason
- Qhira's silence (Silent Killer) stops enemies channelling Blackheart's Bay's objective. Only when Qhira takes Silent Killer.
- Illidan Score 57 Theory Illidan can reach channelling enemies quickly (Bolt of the Storm) to contest Blackheart's Bay's objective. Only when Illidan takes Bolt of the Storm.
1 more reason
- Illidan can cover ground quickly (Bolt of the Storm) on Blackheart's Bay's large layout. Only when Illidan takes Bolt of the Storm.
- Imperius Score 57 Theory Imperius can reach channelling enemies quickly (Valorous Pursuit) to contest Blackheart's Bay's objective. Only when Imperius takes Valorous Pursuit.
1 more reason
- Imperius can cover ground quickly (Valorous Pursuit) on Blackheart's Bay's large layout. Only when Imperius takes Valorous Pursuit.
- Jaina Score 57 Theory Jaina can reach channelling enemies quickly (Ice Blink) to contest Blackheart's Bay's objective. Only when Jaina takes Ice Blink.
1 more reason
- Jaina can cover ground quickly (Ice Blink) on Blackheart's Bay's large layout. Only when Jaina takes Ice Blink.
- Nova Score 57 Theory Nova can reach channelling enemies quickly (Permanent Cloak, Ghost Protocol) to contest Blackheart's Bay's objective.
- Thrall Score 57 Theory Thrall can reach channelling enemies quickly (Wind Rush) to contest Blackheart's Bay's objective. Only when Thrall takes Wind Rush.
1 more reason
- Thrall can cover ground quickly (Wind Rush) on Blackheart's Bay's large layout. Only when Thrall takes Wind Rush.
- Arthas Score 56 Theory Arthas can siege structures (Summon Sindragosa), which adds to Blackheart's Bay's objective pressure. Only when Arthas takes Summon Sindragosa.
- Mei Score 56 Theory Mei can siege structures (Slushball), which adds to Blackheart's Bay's objective pressure. Only when Mei takes Slushball.
- Whitemane Score 56 Theory Whitemane's map-wide reach (Guiding Light) offsets Blackheart's Bay's long rotations. Only when Whitemane takes Guiding Light.
2 more reasons
- Whitemane has little mobility to rotate across Blackheart's Bay's large layout.
- Whitemane can reach channelling enemies quickly (Guiding Light) to contest Blackheart's Bay's objective. Only when Whitemane takes Guiding Light.
- Alexstrasza Score 55 Theory Alexstrasza's waveclear (Flame Buffet, Wing Buffet) helps hold lanes against Blackheart's Bay's pushing objective.
- Blaze Score 55 Theory Blaze's waveclear (Flame Stream, Pyromania) helps hold lanes against Blackheart's Bay's pushing objective.
- Chromie Score 55 Theory Chromie has little mobility to rotate across Blackheart's Bay's large layout.
3 more reasons
- Chromie's Time Stop (Time Trap, Chronic Conditions) stops enemies channelling Blackheart's Bay's objective.
- Chromie can reach channelling enemies quickly (Here and There, Stuck in a Loop) to contest Blackheart's Bay's objective. Only when Chromie takes Here and There or Stuck in a Loop.
- Chromie can cover ground quickly (Here and There, Stuck in a Loop) on Blackheart's Bay's large layout. Only when Chromie takes Here and There or Stuck in a Loop.
- D.Va Score 55 Theory D.Va's waveclear (Self-Destruct, Mech Mode) helps hold lanes against Blackheart's Bay's pushing objective.
- Hogger Score 55 Theory Hogger's waveclear (Staggering Blow, Loot Hoard) helps hold lanes against Blackheart's Bay's pushing objective.
- Johanna Score 55 Theory Johanna's waveclear (Condemn) helps hold lanes against Blackheart's Bay's pushing objective.
- Lúcio Score 55 Theory Lúcio's waveclear (Soundwave, Push Off) helps hold lanes against Blackheart's Bay's pushing objective.
- Orphea Score 55 Theory Orphea's waveclear (Shadow Waltz, Chomp) helps hold lanes against Blackheart's Bay's pushing objective.
- Rexxar Score 55 Theory Rexxar's waveclear (Spirit Swoop, Misha, Charge!) helps hold lanes against Blackheart's Bay's pushing objective.
- Yrel Score 55 Theory Yrel's waveclear (Vindication, Righteous Hammer) helps hold lanes against Blackheart's Bay's pushing objective.
- Genji Score 54 Theory Genji can reach channelling enemies quickly (Pathfinder) to contest Blackheart's Bay's objective. Only when Genji takes Pathfinder.
- Greymane Score 54 Theory Greymane can reach channelling enemies quickly (Eyes in the Dark) to contest Blackheart's Bay's objective. Only when Greymane takes Eyes in the Dark.
- Tassadar Score 54 Theory Tassadar can reach channelling enemies quickly (Shadow Walk) to contest Blackheart's Bay's objective. Only when Tassadar takes Shadow Walk.
- Artanis Score 53 Theory Artanis's waveclear (Amateur Opponent) helps hold lanes against Blackheart's Bay's pushing objective. Only when Artanis takes Amateur Opponent.
- Gul'dan Score 53 Theory Gul'dan has little mobility to rotate across Blackheart's Bay's large layout.
3 more reasons
- Gul'dan can reach channelling enemies quickly (Demonic Circle) to contest Blackheart's Bay's objective. Only when Gul'dan takes Demonic Circle.
- Gul'dan can cover ground quickly (Demonic Circle) on Blackheart's Bay's large layout. Only when Gul'dan takes Demonic Circle.
- Gul'dan's silence (Horrify) stops enemies channelling Blackheart's Bay's objective. Only when Gul'dan takes Horrify.
- Valla Score 53 Theory Valla's waveclear (Monster Hunter) helps hold lanes against Blackheart's Bay's pushing objective. Only when Valla takes Monster Hunter.
- Varian Score 53 Theory Varian's silence (Taunt) stops enemies channelling Blackheart's Bay's objective. Only when Varian takes Taunt.
- Zarya Score 53 Theory Zarya's silence (Gravity Kills) stops enemies channelling Blackheart's Bay's objective. Only when Zarya takes Gravity Kills.
- Raynor Score 51 Theory Raynor has little mobility to rotate across Blackheart's Bay's large layout.
2 more reasons
- Raynor can siege structures (Hyperion), which adds to Blackheart's Bay's objective pressure. Only when Raynor takes Hyperion.
- Raynor's waveclear (Exterminator) helps hold lanes against Blackheart's Bay's pushing objective. Only when Raynor takes Exterminator.
Heroes who struggle on Blackheart's Bay
Score under 50: the map's layout or objective works against the kit, hardest first
-
Why? 1
- TheoryAnduin has little mobility to rotate across Blackheart's Bay's large layout.
-
Why? 1
- TheoryLt. Morales has little mobility to rotate across Blackheart's Bay's large layout.
-
Why? 1
- TheoryZul'jin has little mobility to rotate across Blackheart's Bay's large layout.
-
Why? 2
- TheoryAna has little mobility to rotate across Blackheart's Bay's large layout.
- TheoryAna's sleep (Sleep Dart) stops enemies channelling Blackheart's Bay's objective.




View 4 more
- Gazlowe Score 48 Theory Gazlowe has little mobility to rotate across Blackheart's Bay's large layout.
1 more reason
- Gazlowe's waveclear (Deth Lazor, Xplodium Charge) helps hold lanes against Blackheart's Bay's pushing objective.
- Kael'thas Score 48 Theory Kael'thas has little mobility to rotate across Blackheart's Bay's large layout.
1 more reason
- Kael'thas's waveclear (Flamestrike, Living Bomb) helps hold lanes against Blackheart's Bay's pushing objective.
- Nazeebo Score 48 Theory Nazeebo has little mobility to rotate across Blackheart's Bay's large layout.
1 more reason
- Nazeebo's waveclear helps hold lanes against Blackheart's Bay's pushing objective.
- Stukov Score 48 Theory Stukov has little mobility to rotate across Blackheart's Bay's large layout.
1 more reason
- Stukov's silence (Lurking Arm, Bio-Explosion Switch) stops enemies channelling Blackheart's Bay's objective.
Recent changes to Blackheart's Bay
-
Heroes of the Storm Balance Patch Notes, 12 Dec 2025
- Cannon damage 2815 → 2875
-
Heroes of the Storm Live Patch Notes, 30 Sep 2025
- Cast time 7 s → 5 s
- 5 other changes (see Blizzard's notes)