Tank · Warcraft
Anub'arak
Traitor King
- Role
- Tank
- Attack
- Melee
- Difficulty
- Hard
- Released
- 7 Oct 2014
- Last patched
- 29 Jul 2025
Counters and synergies
Anub'arak is strong against
Score 1–100 for Anub'arak's net edge once both kits are weighed (50 = neutral)
-
Why? 3
- CuratedHarden Carapace's Spell Armor absorbs Li-Ming's all-Ability damage, and Impale or Cocoon catches her once Teleport is spent, at which point 1270 Health evaporates.via Harden Carapace, Impale, Cocoon, Teleport
- TheoryAnub'arak brings Spell Armor (Harden Carapace, The Traitor King), which blunts Li-Ming's ability burst.
- TheoryAnub'arak can interrupt channels with stun (Impale, Burrow Charge), and Li-Ming relies on channelled abilities. Only when Li-Ming takes Disintegrate.
-
Why? 2
- CuratedChromie has no escape in her base kit; Burrow Charge lands on her, Impale follows, and Harden Carapace soaks Sand Blast on the way in.via Burrow Charge, Impale, Harden Carapace, Sand Blast
- TheoryAnub'arak brings Spell Armor (Harden Carapace, The Traitor King), which blunts Chromie's ability burst.
-
Why? 3
- CuratedJaina's damage is all spells, so Harden Carapace's Spell Armor and shield blunt Blizzard and Cone of Cold, and Burrow Charge or Impale stuns her before Ice Block is unlocked.via Harden Carapace, Burrow Charge, Impale, Blizzard, Cone of Cold, Improved Ice Block
- CuratedHarden Carapace's Spell Armor and shield soak Jaina's Ability-only damage, and Impale or Burrow Charge reaches her through the frontline, where 1365 Health melts.
- TheoryAnub'arak brings Spell Armor (Harden Carapace, The Traitor King), which blunts Jaina's ability burst.
-
Why? 3
- CuratedHarden Carapace's Spell Armor blunts the whole combo, Burrow Charge or Impale reaches an immobile Kel'Thuzad before he lands Chains, and Debilitation (level 16) halves his Spell Power on top.via Harden Carapace, Burrow Charge, Impale, Debilitation
- TheoryAnub'arak brings Spell Armor (Harden Carapace, The Traitor King), which blunts Kel'Thuzad's ability burst.
- TheoryKel'Thuzad's area damage (Death and Decay, Frost Nova) clears Anub'arak's summoned units quickly.
-
Why? 2
- CuratedHarden Carapace adds 40 Spell Armor on top of its shield, blunting Alarak's ability-based burst, and Impale or Burrow Charge stuns him before his combo finishes.via Harden Carapace, Impale, Burrow Charge, Sadism
- TheoryAnub'arak can interrupt channels with stun (Impale, Burrow Charge), and Alarak relies on channelled abilities. Only when Alarak takes Deadly Charge.
-
Why? 6
- CuratedMephisto's damage is entirely Abilities, so Harden Carapace's 40 Spell Armor blunts it, and Debilitation (level 16) halves his Spell Power after Impale or Burrow Charge.via Harden Carapace, Debilitation, Impale, Burrow Charge
- TheoryAnub'arak has the crowd control and body-blocking to peel Mephisto off a target.
- TheoryAnub'arak's stun (Impale, Burrow Charge) can stop Mephisto in the middle of a dive.
- TheoryAnub'arak can interrupt channels with stun (Impale, Burrow Charge), and Mephisto relies on channelled abilities. Only when Mephisto takes Consume Souls.
- TheoryMephisto deals damage based on maximum Health (Static Field), which hits high-Health heroes like Anub'arak hardest. Only when Mephisto takes Static Field.
- TheoryMephisto's area damage (Skull Missile, Shade of Mephisto) clears Anub'arak's summoned units quickly.




View 9 more
- Junkrat Score 70 Curated Harden Carapace's Spell Armor and shield soak Junkrat's all-Ability damage, and Burrow Charge or Impale reaches a 1425-Health target whose only basic escape is a Concussion Mine self-knockback.
3 more reasons
- Anub'arak brings Spell Armor (Harden Carapace, The Traitor King), which blunts Junkrat's ability burst.
- Junkrat's area damage (Frag Launcher, Concussion Mine) clears Anub'arak's summoned units quickly.
- Junkrat reduces enemy Armor (Big As), offsetting Anub'arak's Spell Armor. Only when Junkrat takes Big As.
- Kerrigan Score 67 Curated Impale or Burrow Charge catches Kerrigan as she dives, Debilitation (level 16) then halves her Spell Power to gut her ability-heavy combo, and Cocoon, if Anub'arak takes it, removes her mid-dive.
3 more reasons
- Anub'arak has the crowd control and body-blocking to peel Kerrigan off a target.
- Anub'arak's stun (Impale, Burrow Charge) can stop Kerrigan in the middle of a dive.
- Kerrigan's area damage (Impaling Blades, Primal Grasp) clears Anub'arak's summoned units quickly.
- Kael'thas Score 66 Curated Burrow Charge surfaces under an immobile Kael'thas from range, and Harden Carapace's Spell Armor shrugs off Flamestrike and Living Bomb while Anub'arak sticks to him.
4 more reasons
- Harden Carapace's Spell Armor soaks Kael'thas's all-Ability damage, Burrow Charge reaches an immobile mage, and Cocoon, if Anub'arak takes it, removes him from the fight.
- Anub'arak brings Spell Armor (Harden Carapace, The Traitor King), which blunts Kael'thas's ability burst.
- Kael'thas deals damage based on maximum Health (Burned Flesh), which hits high-Health heroes like Anub'arak hardest. Only when Kael'thas takes Burned Flesh.
- Kael'thas's area damage (Flamestrike, Living Bomb) clears Anub'arak's summoned units quickly.
- Orphea Score 62 Curated Harden Carapace's Spell Armor blunts Orphea's Ability damage, and Impale catches her once Shadow Waltz's dash has been used.
4 more reasons
- Anub'arak brings Spell Armor (Harden Carapace, The Traitor King), which blunts Orphea's ability burst.
- Orphea deals damage based on maximum Health (Bond of Anguish), which hits high-Health heroes like Anub'arak hardest. Only when Orphea takes Bond of Anguish.
- Orphea's area damage (Shadow Waltz, Chomp) clears Anub'arak's summoned units quickly.
- Orphea reduces enemy Armor (Dead Magic), offsetting Anub'arak's Spell Armor. Only when Orphea takes Dead Magic.
- Nazeebo Score 61 Curated Harden Carapace's Spell Armor soaks Nazeebo's all-Ability damage, and Burrow Charge or Impale reaches a Witch Doctor who has no escape.
3 more reasons
- Anub'arak can interrupt channels with stun (Impale, Burrow Charge), and Nazeebo relies on channelled abilities. Only when Nazeebo takes Ravenous Spirit.
- Nazeebo's area damage clears Anub'arak's summoned units quickly.
- Nazeebo reduces healing received (Annihilating Spirit), which blunts Anub'arak's self-healing in melee range. Only when Nazeebo takes Annihilating Spirit. Anub'arak must also take Locust Swarm or Hive Master.
- Genji Score 75 Theory Anub'arak brings Spell Armor (Harden Carapace, The Traitor King), which blunts Genji's ability burst.
2 more reasons
- Anub'arak has the crowd control and body-blocking to peel Genji off a target.
- Anub'arak's stun (Impale, Burrow Charge) can stop Genji in the middle of a dive.
- Greymane Score 65 Theory Anub'arak has the crowd control and body-blocking to peel Greymane off a target.
1 more reason
- Anub'arak's stun (Impale, Burrow Charge) can stop Greymane in the middle of a dive.
- Kharazim Score 65 Theory Anub'arak has the crowd control and body-blocking to peel Kharazim off a target.
1 more reason
- Anub'arak's stun (Impale, Burrow Charge) can stop Kharazim in the middle of a dive.
- Zeratul Score 65 Theory Anub'arak has the crowd control and body-blocking to peel Zeratul off a target.
1 more reason
- Anub'arak's stun (Impale, Burrow Charge) can stop Zeratul in the middle of a dive.
15 more below the bar
Weaker mechanical edges
Generic rule matches with no hand-written matchup behind them: scoring under 65, or past the 8 strongest.
- Tracer Score 64 Theory Anub'arak brings Spell Armor (Harden Carapace, The Traitor King), which blunts Tracer's ability burst.
- Nova Score 62 Theory Anub'arak brings Spell Armor (Harden Carapace, The Traitor King), which blunts Nova's ability burst.
- Anduin Score 57 Theory Anub'arak can interrupt channels with stun (Impale, Burrow Charge), and Anduin relies on channelled abilities.
- Imperius Score 57 Theory Anub'arak can interrupt channels with stun (Impale, Burrow Charge), and Imperius relies on channelled abilities.
- Li Li Score 57 Theory Anub'arak can interrupt channels with stun (Impale, Burrow Charge), and Li Li relies on channelled abilities.
- Stukov Score 57 Theory Anub'arak can interrupt channels with stun (Impale, Burrow Charge), and Stukov relies on channelled abilities.
- Tassadar Score 57 Theory Anub'arak brings Spell Armor (Harden Carapace, The Traitor King), which blunts Tassadar's ability burst.
- Whitemane Score 57 Theory Anub'arak can interrupt channels with stun (Impale, Burrow Charge), and Whitemane relies on channelled abilities.
- Illidan Score 56 Theory Anub'arak has the crowd control and body-blocking to peel Illidan off a target.
- Sonya Score 56 Theory Anub'arak has the crowd control and body-blocking to peel Sonya off a target.
- The Butcher Score 56 Theory Anub'arak has the crowd control and body-blocking to peel The Butcher off a target.
- Thrall Score 56 Theory Anub'arak has the crowd control and body-blocking to peel Thrall off a target.
- Qhira Score 53 Theory Anub'arak has the crowd control and body-blocking to peel Qhira off a target.
- Artanis Score 52 Theory Anub'arak has the crowd control and body-blocking to peel Artanis off a target.
- Hanzo Score 52 Theory Anub'arak brings Spell Armor (Harden Carapace, The Traitor King), which blunts Hanzo's ability burst.
Anub'arak is weak against
Score 1–100 for their net edge over Anub'arak's kit
-
Why? 3
- CuratedMalthael's damage and healing scale with max health: Reaper's Mark ticks 2% per second and Soul Rip heals him 4% of each marked hero's max health, so a tank feeds him.via Reaper's Mark, Soul Rip
- TheoryMalthael deals damage based on maximum Health (Reaper's Mark, Throwing Shade), which hits high-Health heroes like Anub'arak hardest.
- TheoryMalthael reduces healing received (Touch of Death), which blunts Anub'arak's self-healing in melee range. Only when Malthael takes Touch of Death. Anub'arak must also take Locust Swarm or Hive Master.
-
Why? 3
- CuratedDeathwing is permanently Unstoppable, so the stuns from Impale and Burrow Charge never land on him and Anub'arak loses most of the lockdown he was picked for.via Aspect of Death, Impale, Burrow Charge
- TheoryDeathwing's area damage (Incinerate, Onslaught) clears Anub'arak's summoned units quickly.
- TheoryDeathwing reduces enemy Armor (Death Drop), offsetting Anub'arak's Spell Armor. Only when Deathwing takes Death Drop.
-
Why? 3
- CuratedMinigun adds 2.5% of max health to every basic attack, and Harden Carapace's Spell Armor does nothing against physical attacks.via Minigun, Harden Carapace
- TheoryTychus deals damage based on maximum Health (Minigun, Titan Grenade), which hits high-Health heroes like Anub'arak hardest.
- TheoryAnub'arak can interrupt channels with stun (Impale, Burrow Charge), and Tychus relies on channelled abilities.
-
Why? 4
- CuratedZul'jin's damage is basic attacks that speed up as he loses health, which Harden Carapace's Spell Armor ignores, and with Taz'dingo!, if he takes it, he outlasts a Burrow Charge dive.via Berserker, Taz'dingo!, Harden Carapace, Burrow Charge
- TheoryZul'jin deals damage based on maximum Health (No Mercy!), which hits high-Health heroes like Anub'arak hardest. Only when Zul'jin takes No Mercy!.
- TheoryZul'jin reduces enemy Armor (No Mercy!), offsetting Anub'arak's Spell Armor. Only when Zul'jin takes No Mercy!.
- TheoryAnub'arak can interrupt channels with stun (Impale, Burrow Charge), and Zul'jin relies on channelled abilities.
-
Why? 4
- TheoryD.Va deals damage based on maximum Health (Rush-down), which hits high-Health heroes like Anub'arak hardest. Only when D.Va takes Rush-down.
- TheoryD.Va's area damage (Self-Destruct, Mech Mode) clears Anub'arak's summoned units quickly.
- TheoryD.Va reduces healing received (Aggression Matrix), which blunts Anub'arak's self-healing in melee range. Only when D.Va takes Aggression Matrix. Anub'arak must also take Locust Swarm or Hive Master.
- TheoryD.Va reduces enemy Armor (Target Locked), offsetting Anub'arak's Spell Armor. Only when D.Va takes Target Locked.
-
Why? 4
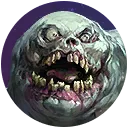
- TheoryStitches deals damage based on maximum Health (Serrated Edge), which hits high-Health heroes like Anub'arak hardest. Only when Stitches takes Serrated Edge.
- TheoryStitches's area damage (Shambling Horror) clears Anub'arak's summoned units quickly.
- TheoryStitches reduces healing received (Master Hooker), which blunts Anub'arak's self-healing in melee range. Only when Stitches takes Master Hooker. Anub'arak must also take Locust Swarm or Hive Master.
- TheoryStitches reduces enemy Armor (Pulverize), offsetting Anub'arak's Spell Armor. Only when Stitches takes Pulverize.




View 6 more
- Leoric Score 71 Theory Leoric deals damage based on maximum Health (Drain Hope, Crushing Hope), which hits high-Health heroes like Anub'arak hardest.
1 more reason
- Leoric's area damage (Skeletal Swing) clears Anub'arak's summoned units quickly.
- Xul Score 71 Theory Xul deals damage based on maximum Health (Backlash), which hits high-Health heroes like Anub'arak hardest. Only when Xul takes Backlash.
2 more reasons
- Xul's area damage (Spectral Scythe, Cursed Strikes) clears Anub'arak's summoned units quickly.
- Xul reduces healing received (Mortal Wound), which blunts Anub'arak's self-healing in melee range. Only when Xul takes Mortal Wound. Anub'arak must also take Locust Swarm or Hive Master.
- Hogger Score 70 Theory Hogger deals damage based on maximum Health (Headbanger), which hits high-Health heroes like Anub'arak hardest. Only when Hogger takes Headbanger.
2 more reasons
- Hogger's area damage (Staggering Blow, Loot Hoard) clears Anub'arak's summoned units quickly.
- Hogger reduces enemy Armor (Power Spike), offsetting Anub'arak's Spell Armor. Only when Hogger takes Power Spike.
- Varian Score 69 Theory Varian deals damage based on maximum Health (Juggernaut), which hits high-Health heroes like Anub'arak hardest. Only when Varian takes Juggernaut.
2 more reasons
- Varian reduces healing received (Mortal Strike), which blunts Anub'arak's self-healing in melee range. Only when Varian takes Mortal Strike. Anub'arak must also take Locust Swarm or Hive Master.
- Varian reduces enemy Armor (Colossus Smash), offsetting Anub'arak's Spell Armor. Only when Varian takes Colossus Smash.
- Raynor Score 67 Theory Raynor deals damage based on maximum Health (Bounty Hunter), which hits high-Health heroes like Anub'arak hardest. Only when Raynor takes Bounty Hunter.
2 more reasons
- Raynor's area damage (Exterminator) clears Anub'arak's summoned units quickly. Only when Raynor takes Exterminator.
- Raynor reduces enemy Armor (Dusk Wing), offsetting Anub'arak's Spell Armor. Only when Raynor takes Dusk Wing.
- Gazlowe Score 66 Theory Gazlowe deals damage based on maximum Health (Hyperfocus Coils, Overklock), which hits high-Health heroes like Anub'arak hardest. Only when Gazlowe takes Hyperfocus Coils or Overklock.
1 more reason
- Gazlowe's area damage (Deth Lazor, Xplodium Charge) clears Anub'arak's summoned units quickly.
32 more below the bar
Weaker mechanical edges
Generic rule matches with no hand-written matchup behind them: scoring under 65, or past the 8 strongest.
- Sylvanas Score 66 Theory Sylvanas deals damage based on maximum Health (Overwhelming Affliction), which hits high-Health heroes like Anub'arak hardest. Only when Sylvanas takes Overwhelming Affliction.
- Tyrande Score 66 Theory Tyrande deals damage based on maximum Health (Empower), which hits high-Health heroes like Anub'arak hardest. Only when Tyrande takes Empower.
- Yrel Score 66 Theory Yrel deals damage based on maximum Health (Templar's Verdict), which hits high-Health heroes like Anub'arak hardest. Only when Yrel takes Templar's Verdict.
- Zagara Score 66 Theory Zagara deals damage based on maximum Health (Corrosive Saliva), which hits high-Health heroes like Anub'arak hardest. Only when Zagara takes Corrosive Saliva.
- Ana Score 65 Theory Ana deals damage based on maximum Health (Night Terrors), which hits high-Health heroes like Anub'arak hardest. Only when Ana takes Night Terrors.
- Cho'gall Score 65 Theory Cho'gall deals damage based on maximum Health (Uppercut, Searing Shadows), which hits high-Health heroes like Anub'arak hardest. Only when Cho'gall takes Uppercut or Searing Shadows.
- Rehgar Score 65 Theory Rehgar deals damage based on maximum Health (Hunger of the Wolf), which hits high-Health heroes like Anub'arak hardest. Only when Rehgar takes Hunger of the Wolf.
- The Lost Vikings Score 65 Theory The Lost Vikings deals damage based on maximum Health (Nordic Attack Squad), which hits high-Health heroes like Anub'arak hardest.
- Cassia Score 64 Theory Cassia deals damage based on maximum Health (Martial Law), which hits high-Health heroes like Anub'arak hardest. Only when Cassia takes Martial Law.
- Garrosh Score 63 Theory Garrosh's area damage (Groundbreaker, Wrecking Ball) clears Anub'arak's summoned units quickly.
- Lúcio Score 63 Theory Lúcio's area damage (Soundwave, Push Off) clears Anub'arak's summoned units quickly.
- Valla Score 63 Theory Valla deals damage based on maximum Health (Manticore), which hits high-Health heroes like Anub'arak hardest. Only when Valla takes Manticore.
- Falstad Score 62 Theory Falstad's area damage (Lightning Rod) clears Anub'arak's summoned units quickly.
- Dehaka Score 60 Theory Dehaka reduces healing received (Paralyzing Enzymes), which blunts Anub'arak's self-healing in melee range. Only when Dehaka takes Paralyzing Enzymes. Anub'arak must also take Locust Swarm or Hive Master.
- Fenix Score 59 Theory Fenix deals damage based on maximum Health (Offensive Cadence), which hits high-Health heroes like Anub'arak hardest. Only when Fenix takes Offensive Cadence.
- Lunara Score 59 Theory Lunara deals damage based on maximum Health (Invigorating Spores), which hits high-Health heroes like Anub'arak hardest. Only when Lunara takes Invigorating Spores.
- Murky Score 59 Theory Murky deals damage based on maximum Health (Wrath of Cod), which hits high-Health heroes like Anub'arak hardest. Only when Murky takes Wrath of Cod.
- Abathur Score 57 Theory Abathur's area damage (Locust Strain) clears Anub'arak's summoned units quickly.
- Alexstrasza Score 57 Theory Alexstrasza's area damage (Flame Buffet, Wing Buffet) clears Anub'arak's summoned units quickly.
- Blaze Score 57 Theory Blaze's area damage (Flame Stream, Pyromania) clears Anub'arak's summoned units quickly.
- Johanna Score 57 Theory Johanna's area damage (Condemn) clears Anub'arak's summoned units quickly.
- Mal'Ganis Score 57 Theory Mal'Ganis's area damage (Fel Claws, Necrotic Embrace) clears Anub'arak's summoned units quickly.
- Rexxar Score 57 Theory Rexxar's area damage (Spirit Swoop, Misha, Charge!) clears Anub'arak's summoned units quickly.
- Sgt. Hammer Score 57 Theory Sgt. Hammer's area damage (Spider Mines, Concussive Blast) clears Anub'arak's summoned units quickly.
- Tyrael Score 57 Theory Tyrael's area damage (El'druin's Might, Smite) clears Anub'arak's summoned units quickly.
- Deckard Score 56 Theory Deckard's area damage (Horadric Cube, Scroll Of Sealing) clears Anub'arak's summoned units quickly.
- Maiev Score 56 Theory Maiev deals damage based on maximum Health (Vengeful Knives), which hits high-Health heroes like Anub'arak hardest. Only when Maiev takes Vengeful Knives.
- Valeera Score 56 Theory Valeera's area damage (Sinister Strike, Blade Flurry) clears Anub'arak's summoned units quickly.
- Azmodan Score 55 Theory Azmodan's area damage (Summon Demon Warrior, Greed) clears Anub'arak's summoned units quickly.
- Probius Score 54 Theory Probius deals damage based on maximum Health (Shoot 'Em Up), which hits high-Health heroes like Anub'arak hardest. Only when Probius takes Shoot 'Em Up.
- Lt. Morales Score 52 Theory Lt. Morales deals damage based on maximum Health (Bedside Manner), which hits high-Health heroes like Anub'arak hardest. Only when Lt. Morales takes Bedside Manner.
- Xal'atath Score 51 Theory Xal'atath deals damage based on maximum Health (Toxic Mark), which hits high-Health heroes like Anub'arak hardest. Only when Xal'atath takes Toxic Mark.
Anub'arak works well with
Score 1–100 for how well the kits combine
-
Why? 4
- CuratedImpale's 1-second stun covers Sand Blast's 0.5-second delay and the staggered blasts of Dragon's Breath.via Impale, Sand Blast, Dragon's Breath
- TheoryAnub'arak peels divers off Chromie, who cannot escape alone.
- TheoryAnub'arak's stun (Impale, Burrow Charge) holds targets still for Chromie's burst.
- TheoryAnub'arak starts fights on its own terms, giving Chromie grouped targets for area burst. Only when Chromie takes Mobius Loop.
-
Why? 4
- CuratedBurrow Charge's stun holds enemies for Flamestrike's 1-second delay, and Gravity Lapse extends the lockdown afterwards.via Burrow Charge, Flamestrike, Gravity Lapse
- TheoryAnub'arak peels divers off Kael'thas, who cannot escape alone.
- TheoryAnub'arak's stun (Impale, Burrow Charge) holds targets still for Kael'thas's burst.
- TheoryAnub'arak starts fights on its own terms, giving Kael'thas grouped targets for area burst.
-
Why? 4
- CuratedImpale's stun, and Cocoon's removal of a peeler if Anub'arak takes it, sets Valeera up, and with Seal Fate (level 16) Sinister Strike hits harder and awards an extra Combo Point on stunned targets.via Impale, Cocoon, Seal Fate, Sinister Strike
- TheoryAnub'arak's stun (Impale, Burrow Charge) holds targets still for Valeera's burst.
- TheoryAnub'arak starts fights on its own terms, giving Valeera grouped targets for area burst.
- TheoryAnub'arak's stun (Impale, Burrow Charge) lets Valeera dive onto a target that cannot walk away.
-
Why? 4
- CuratedImpale and Burrow Charge stun targets so Zeratul can land Singularity Spike and Cleave, and Cocoon, if Anub'arak takes it, removes a peeler from the fight.via Impale, Burrow Charge, Cocoon, Singularity Spike, Cleave
- TheoryAnub'arak's stun (Impale, Burrow Charge) holds targets still for Zeratul's burst.
- TheoryAnub'arak starts fights on its own terms, giving Zeratul grouped targets for area burst.
- TheoryAnub'arak's stun (Impale, Burrow Charge) lets Zeratul dive onto a target that cannot walk away.
-
Why? 2
- CuratedBurrow Charge or Impale stuns the dive target, so Illidan lands Dive and Sweeping Strike before the enemy can peel him.via Burrow Charge, Impale, Dive, Sweeping Strike
- TheoryAnub'arak's stun (Impale, Burrow Charge) lets Illidan dive onto a target that cannot walk away.
-
Why? 3
- TheoryAnub'arak's stun (Impale, Burrow Charge) holds targets still for Genji's burst.
- TheoryAnub'arak starts fights on its own terms, giving Genji grouped targets for area burst.
- TheoryAnub'arak's stun (Impale, Burrow Charge) lets Genji dive onto a target that cannot walk away.



View 7 more
- Jaina Score 77 Theory Anub'arak's stun (Impale, Burrow Charge) holds targets still for Jaina's burst.
2 more reasons
- Anub'arak starts fights on its own terms, giving Jaina grouped targets for area burst.
- Anub'arak can protect Jaina's fragile body when the enemy hunts it.
- Kel'Thuzad Score 77 Theory Anub'arak peels divers off Kel'Thuzad, who cannot escape alone.
2 more reasons
- Anub'arak's stun (Impale, Burrow Charge) holds targets still for Kel'Thuzad's burst.
- Anub'arak starts fights on its own terms, giving Kel'Thuzad grouped targets for area burst.
- Kerrigan Score 77 Theory Anub'arak's stun (Impale, Burrow Charge) holds targets still for Kerrigan's burst.
2 more reasons
- Anub'arak starts fights on its own terms, giving Kerrigan grouped targets for area burst.
- Anub'arak's stun (Impale, Burrow Charge) lets Kerrigan dive onto a target that cannot walk away.
- Murky Score 77 Theory Anub'arak's stun (Impale, Burrow Charge) holds targets still for Murky's burst.
2 more reasons
- Anub'arak starts fights on its own terms, giving Murky grouped targets for area burst.
- Anub'arak can protect Murky's fragile body when the enemy hunts it.
- Probius Score 77 Theory Anub'arak's stun (Impale, Burrow Charge) holds targets still for Probius's burst.
2 more reasons
- Anub'arak starts fights on its own terms, giving Probius grouped targets for area burst.
- Anub'arak can protect Probius's fragile body when the enemy hunts it.
- Tracer Score 77 Theory Anub'arak's stun (Impale, Burrow Charge) holds targets still for Tracer's burst.
2 more reasons
- Anub'arak starts fights on its own terms, giving Tracer grouped targets for area burst.
- Anub'arak's stun (Impale, Burrow Charge) lets Tracer dive onto a target that cannot walk away.
- Li-Ming Score 76 Theory Anub'arak's stun (Impale, Burrow Charge) holds targets still for Li-Ming's burst.
2 more reasons
- Anub'arak can protect Li-Ming's fragile body when the enemy hunts it.
- Anub'arak starts fights on its own terms, giving Li-Ming grouped targets for area burst. Only when Li-Ming takes Wave of Force.
24 more below the bar
Weaker mechanical edges
Generic rule matches with no hand-written matchup behind them: scoring under 65, or past the 8 strongest.
- Nova Score 76 Theory Anub'arak's stun (Impale, Burrow Charge) holds targets still for Nova's burst.
- Alarak Score 71 Theory Anub'arak's stun (Impale, Burrow Charge) holds targets still for Alarak's burst.
- Junkrat Score 71 Theory Anub'arak's stun (Impale, Burrow Charge) holds targets still for Junkrat's burst.
- Orphea Score 71 Theory Anub'arak's stun (Impale, Burrow Charge) holds targets still for Orphea's burst.
- Tassadar Score 71 Theory Anub'arak's stun (Impale, Burrow Charge) holds targets still for Tassadar's burst.
- Xal'atath Score 71 Theory Anub'arak's stun (Impale, Burrow Charge) holds targets still for Xal'atath's burst.
- Hanzo Score 68 Theory Anub'arak's stun (Impale, Burrow Charge) holds targets still for Hanzo's burst.
- Azmodan Score 65 Theory Anub'arak peels divers off Azmodan, who cannot escape alone.
- Gul'dan Score 65 Theory Anub'arak peels divers off Gul'dan, who cannot escape alone.
- Nazeebo Score 65 Theory Anub'arak peels divers off Nazeebo, who cannot escape alone.
- Raynor Score 65 Theory Anub'arak peels divers off Raynor, who cannot escape alone.
- Sgt. Hammer Score 65 Theory Anub'arak peels divers off Sgt. Hammer, who cannot escape alone.
- Zul'jin Score 65 Theory Anub'arak peels divers off Zul'jin, who cannot escape alone.
- Abathur Score 60 Theory Anub'arak can protect Abathur's fragile body when the enemy hunts it.
- The Lost Vikings Score 60 Theory Anub'arak can protect The Lost Vikings's fragile body when the enemy hunts it.
- Artanis Score 57 Theory Anub'arak's stun (Impale, Burrow Charge) lets Artanis dive onto a target that cannot walk away.
- Greymane Score 57 Theory Anub'arak's stun (Impale, Burrow Charge) lets Greymane dive onto a target that cannot walk away.
- Kharazim Score 57 Theory Anub'arak's stun (Impale, Burrow Charge) lets Kharazim dive onto a target that cannot walk away.
- Maiev Score 57 Theory Anub'arak's stun (Impale, Burrow Charge) lets Maiev dive onto a target that cannot walk away.
- Mephisto Score 57 Theory Anub'arak's stun (Impale, Burrow Charge) lets Mephisto dive onto a target that cannot walk away.
- Qhira Score 57 Theory Anub'arak's stun (Impale, Burrow Charge) lets Qhira dive onto a target that cannot walk away.
- Sonya Score 57 Theory Anub'arak's stun (Impale, Burrow Charge) lets Sonya dive onto a target that cannot walk away.
- The Butcher Score 57 Theory Anub'arak's stun (Impale, Burrow Charge) lets The Butcher dive onto a target that cannot walk away.
- Thrall Score 57 Theory Anub'arak's stun (Impale, Burrow Charge) lets Thrall dive onto a target that cannot walk away.
Spot a wrong or missing matchup? Suggest a correction with the mechanical reason; accepted notes land in the theory layer for everyone.
Maps
Best maps for Anub'arak
Score 1–100 from how the kit fits each map's layout and objective (50 = neutral)
-
Why? 2
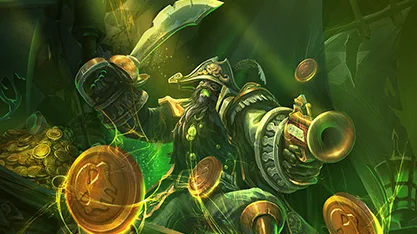
- TheoryAnub'arak can reach channelling enemies quickly (Burrow Charge) to contest Blackheart's Bay's objective.
- TheoryAnub'arak can cover ground quickly (Burrow Charge) on Blackheart's Bay's large layout.
-
Why? 2
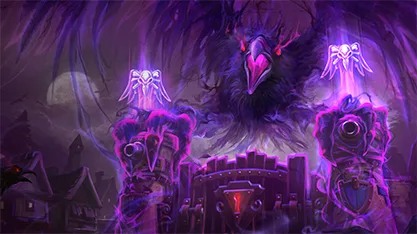
- TheoryAnub'arak can reach channelling enemies quickly (Burrow Charge) to contest Cursed Hollow's objective.
- TheoryAnub'arak can cover ground quickly (Burrow Charge) on Cursed Hollow's large layout.
-
Why? 2
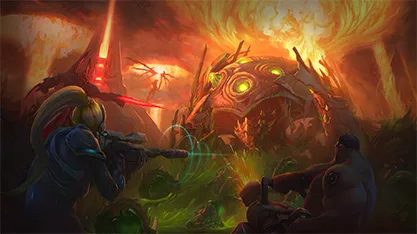
- TheoryAnub'arak can reach channelling enemies quickly (Burrow Charge) to contest Warhead Junction's objective.
- TheoryAnub'arak can cover ground quickly (Burrow Charge) on Warhead Junction's large layout.
-
Why? 2
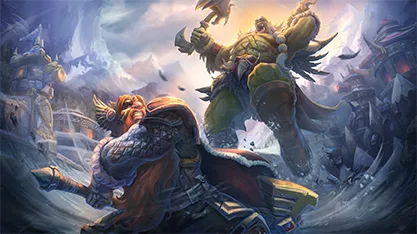
- TheoryAnub'arak can start the fights Alterac Pass's objective forces.
- TheoryAnub'arak's summons (Scarab Host, Legion of Beetles) add damage to Alterac Pass's neutral objective.
-
Why? 2
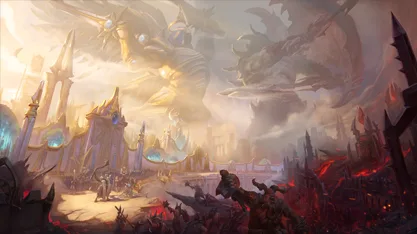
- TheoryAnub'arak can start the fights Battlefield of Eternity's objective forces.
- TheoryAnub'arak's summons (Scarab Host, Legion of Beetles) add damage to Battlefield of Eternity's neutral objective.
-
Why? 2
- TheoryAnub'arak can cover ground quickly (Burrow Charge) on Garden of Terror's large layout.
- TheoryAnub'arak's summons (Scarab Host, Legion of Beetles) add damage to Garden of Terror's neutral objective.
View 12 more
- Infernal Shrines Score 60 Theory Anub'arak can start the fights Infernal Shrines's objective forces.
1 more reason
- Anub'arak's summons (Scarab Host, Legion of Beetles) add damage to Infernal Shrines's neutral objective.
- Sky Temple Score 60 Theory Anub'arak can start the fights Sky Temple's objective forces.
1 more reason
- Anub'arak can cover ground quickly (Burrow Charge) on Sky Temple's large layout.
- Dragon Shire Score 57 Theory Anub'arak can reach channelling enemies quickly (Burrow Charge) to contest Dragon Shire's objective.
- Towers of Doom Score 57 Theory Anub'arak can reach channelling enemies quickly (Burrow Charge) to contest Towers of Doom's objective.
- Braxis Holdout Score 55 Theory Anub'arak can start the fights Braxis Holdout's objective forces.
- Braxis Outpost Score 55 Theory Anub'arak can start the fights Braxis Outpost's objective forces.
- Hanamura Temple Score 55 Theory Anub'arak can start the fights Hanamura Temple's objective forces.
- Haunted Mines Score 55 Theory Anub'arak's summons (Scarab Host, Legion of Beetles) add damage to Haunted Mines's neutral objective.
- Industrial District Score 55 Theory Anub'arak can start the fights Industrial District's objective forces.
- Lost Cavern Score 55 Theory Anub'arak can start the fights Lost Cavern's objective forces.
- Silver City Score 55 Theory Anub'arak can start the fights Silver City's objective forces.
- Volskaya Foundry Score 55 Theory Anub'arak can start the fights Volskaya Foundry's objective forces.
Talents
Talents by level
-
Level 1
-

Nerubian Armor W
Increase Harden Carapace's Spell Armor by 25.
-

Legion of Beetles Trait
Beetles have 30 Spell Armor. Automatically spawn a Beetle every 12 seconds. Can be toggled on and off.
-

Regeneration Master Passive Quest
Quest: Gathering a Regeneration Globe increases your Health Regeneration by 1 per second, up to 30. Reward: After gathering 25 Regeneration Globes, you also gain 500 Health.
-
-
Level 4
-

Bed of Barbs Q
Create a bed of spikes along Impale's path that Slows enemies by 25% and deals 21 (+4% per level) damage per second. Spikes persist for 3.5 seconds.
-
Shed Exoskeleton W
Harden Carapace grants 30% increased Movement Speed for 3 seconds.
-

Underking E
Increases Burrow Charge range by 20% and damage by 100%.
-
-
Level 7
-
Chitinous Plating W
While Harden Carapace is active, taking damage from enemy Abilities reduces its cooldown by 1 second, up to 3 seconds.
-
Subterranean Shield E
Burrow Charge also grants a 400 (+4% per level) point Shield for 5 seconds.
-
Leeching Scarabs Trait
Beetles attacks deal 30% more damage and heal Anub'arak 50% of damage dealt if he is nearby.
-
-
Level 10
-

Locust Swarm Heroic
Deal 68 (+4% per level) damage per second to nearby enemies. Each enemy damaged restores 24 (+4% per level) Health. Lasts 6 seconds.
-

Cocoon Heroic
Wraps target enemy Hero in a cocoon, rendering them unable to act or be targeted for 7 seconds. Allies of the Hero can attack the cocoon to break it and free them early.
-
-
Level 13
-
Urticating Spines W
Casting Harden Carapace will also deal 90 (+4% per level) damage to nearby enemies. Deals double damage against Heroes.
-

Burning Beetles Trait
Deal 21 (+4% per level) damage per second to nearby enemies. Beetles deal 6 (+4% per level) damage per second to nearby enemies.
-

Acid-Drenched Mandibles Passive
Attacking a Hero that is Slowed, Rooted, or Stunned increases Anub'arak's Basic Attack damage by 80% for 4 seconds.
-
-
Level 16
-
Epicenter E
Increases Burrow Charge impact area by 60% and lowers the cooldown by 1 second for each Hero hit.
-

Debilitation Passive
Enemy Heroes hit by Burrow Charge or Impale have their Spell Power reduced by 50% for 4 seconds.
-
Beetle, Juiced Trait
Passive: Beetles gain 30% increased health. Every 4th Basic Attack spawns a Beetle.
-
-
Level 20
-
Hive Master Heroic
Gain a permanent Vampire Locust that attacks a nearby enemy every 3 seconds. The Vampire Locust deals 165 (+4% per level) damage and returns to heal Anub'arak for 80 (+4% per level) health.
-
Cryptweave Heroic
Staying near the Cocoon allows Anub'arak to extend the duration by up to 6 seconds per Cocoon. Upon exiting the Cocoon, enemies take 60 (+4% per level) damage over 4 seconds. This damage is increased by 100% for each second that they were inside.
-

The Traitor King Active
Gain 10% bonus maximum Health and 20 Spell Armor. Activate to gain 75 Armor for 4 seconds.
-

Rewind Active
Activate to reset the cooldowns of your Basic Abilities.
-
Abilities and mechanics
-
Scarab Host D Trait
Using an Ability spawns a Beetle which loses Health over 10 seconds, attacking nearby enemies for 20 (+4% per level) damage.
-
Impale Q Ability
Deals 90 (+4% per level) damage. Stuns for 1 second.
-
Harden Carapace W Ability
Gain a Shield that grants 40 Spell Armor and absorbs 340 (+4% per level) damage over 3 seconds.
-
Burrow Charge E Ability
Burrow to the target location, dealing 91 (+4% per level) damage and briefly stunning enemies in a small area upon surfacing, slowing them by 25% for 2.5 seconds. Burrow Charge can be reactivated to surface early.
-
Cocoon R Heroic
Wraps target enemy Hero in a cocoon, rendering them unable to act or be targeted for 7 seconds. Allies of the Hero can attack the cocoon to break it and free them early.
-
Locust Swarm R Heroic
Deal 68 (+4% per level) damage per second to nearby enemies. Each enemy damaged restores 24 (+4% per level) Health. Lasts 6 seconds.
Mechanics tags
What the theory layer reads from Anub'arak's kit. Each tag shows the ability or talent text that produced it; curated notes cover play-style traits the text cannot show.
Crowd control
Defense and mobility
Damage and macro
Play-style traits
Patch history
- Heroes of the Storm Live Patch Notes, 29 Jul 2025 Patch Buffed
1 buff
- BuffRegeneration Master: Quest collection requirement 30 → 25Level 1
Guides and links
Guides and builds
Reference and esports
Whetstone links to these sites and never copies their write-ups; credit and copyright stay with their authors.