
Support · StarCraft
Abathur
Evolution Master
- Role
- Support
- Attack
- Melee
- Difficulty
- Very Hard
- Released
- 13 Mar 2014
- Last patched
- 28 Sep 2026
Counters and synergies
Abathur is strong against
Score 1–100 for Abathur's net edge once both kits are weighed (50 = neutral)
-
Why? 6
- CuratedToxic Nests stacked in the side lanes reveal and chunk lone Vikings who are quietly soaking there (Prolific Dispersal at level 4 adds charges), and Locusts keep contesting the lanes the Vikings want to hold. Only when the Vikings split up to soak lanes on their own.via Toxic Nest, Prolific Dispersal, Locust Strain
- TheoryAbathur's map-wide reach helps answer The Lost Vikings's side-lane pressure.
- TheoryAbathur can reveal enemies (Toxic Nest), taking away The Lost Vikings's stealth. Only when The Lost Vikings takes Spy Games.
- TheoryAbathur clears waves quickly (Locust Strain), so The Lost Vikings's lane pressure buys less.
- TheoryAbathur can interrupt channels with stun (Slapathur), and The Lost Vikings relies on channelled abilities. Only when Abathur takes Slapathur. The Lost Vikings must also take Play Again!.
- TheoryThe Lost Vikings can approach unseen (Spy Games) and catch Abathur, who is easy to kill when found alone. Only when The Lost Vikings takes Spy Games.
-
Why? 5
- CuratedMurky wants to farm a lane alone with only 730 health; Toxic Nests reveal him and take big chunks, and with Slapathur Abathur's own attacks stun him every 6 seconds while Locusts hold the wave. Only when Murky is farming a lane alone.via Toxic Nest, Slapathur, Locust Strain, Spawn Egg
- TheoryAbathur's map-wide reach helps answer Murky's side-lane pressure.
- TheoryAbathur clears waves quickly (Locust Strain), so Murky's lane pressure buys less.
- TheoryAbathur can interrupt channels with stun (Slapathur), and Murky relies on channelled abilities. Only when Abathur takes Slapathur. Murky must also take Never-Ending Murlocs.
- TheoryMurky's burst (Pufferfish, Slime) can delete Abathur's small Health pool before help arrives.
-
Why? 2
- CuratedSymbiote can sit on a threatened tower, so Abathur answers Zagara's siege in whichever lane she picks; Spike Burst and Stab clean up Roachlings and Hunter Killers before they chip the structure down. Only when Abathur is defending structures from a summon-led push rather than fighting in the open.via Symbiote, Spike Burst, Stab, Infested Drop, Hunter Killer
- TheoryZagara clears waves quickly (Baneling Barrage, Infested Drop), so Abathur's lane pressure buys less.
-
Why? 1
- TheoryAbathur's map-wide reach helps answer Xul's side-lane pressure.




7 more below the bar
Weaker mechanical edges
Generic rule matches with no hand-written matchup behind them: scoring under 65, or past the 8 strongest.
- Samuro Score 64 Theory Abathur can reveal enemies (Toxic Nest), taking away Samuro's stealth.
- Li Li Score 62 Theory Abathur's area damage (Locust Strain) clears Li Li's summoned units quickly.
- Malfurion Score 59 Theory Abathur's area damage (Locust Strain) clears Malfurion's summoned units quickly. Only when Malfurion takes Vengeful Roots.
- Tychus Score 59 Theory Abathur's area damage (Locust Strain) clears Tychus's summoned units quickly. Only when Tychus takes Drakken Laser Drill.
- Sylvanas Score 58 Theory Abathur's map-wide reach helps answer Sylvanas's side-lane pressure.
- Anub'arak Score 57 Theory Abathur's area damage (Locust Strain) clears Anub'arak's summoned units quickly.
- Dehaka Score 57 Theory Abathur can reveal enemies (Toxic Nest), taking away Dehaka's stealth. Only when Dehaka takes Lurker Strain.
Abathur is weak against
Score 1–100 for their net edge over Abathur's kit
-
Why? 3
- CuratedThree Blink charges let Tracer cover ground fast to find Abathur's body, and her nonstop basic attacks plus Melee kill it before his team can rotate to help.via Blink, Melee, Reload
- TheoryTracer can dive onto Abathur, whose small Health pool rarely survives a committed dive.
- TheoryTracer's burst (Melee) can delete Abathur's small Health pool before help arrives.
-
Why? 4
- CuratedFlight reaches Abathur's hidden body over terrain, and Lightning Rod's repeated strikes finish it while Falstad stays close.via Flight, Lightning Rod, Deep Tunnel
- TheoryFalstad's map-wide reach (Flight) helps answer Abathur's side-lane pressure.
- TheoryFalstad's area damage (Lightning Rod) clears Abathur's summoned units quickly.
- TheoryFalstad clears waves quickly (Lightning Rod), so Abathur's lane pressure buys less.
-
Why? 6
- CuratedPermanent Cloak lets Zeratul walk straight up to Abathur's unguarded body, and Cleave, Singularity Spike and a couple of Basic Attacks take its 685 Health before Deep Tunnel's 30-second cooldown can get him out.via Permanent Cloak, Cleave, Singularity Spike, Deep Tunnel
- TheoryZeratul can approach unseen (Permanent Cloak) and catch Abathur, who is easy to kill when found alone.
- TheoryZeratul can dive onto Abathur, whose small Health pool rarely survives a committed dive.
- TheoryZeratul's burst (Singularity Spike, Cleave) can delete Abathur's small Health pool before help arrives.
- TheoryAbathur can reveal enemies (Toxic Nest), taking away Zeratul's stealth.
- TheoryAbathur's stun (Slapathur) can stop Zeratul in the middle of a dive. Only when Abathur takes Slapathur.
-
Why? 6
- CuratedCyber Agility hops walls straight to where Abathur hides, and a Shuriken volley plus Swift Strike is more than enough burst for his small health pool.via Cyber Agility, Shuriken, Swift Strike
- TheoryGenji can dive onto Abathur, whose small Health pool rarely survives a committed dive.
- TheoryGenji's burst can delete Abathur's small Health pool before help arrives.
- TheoryGenji can approach unseen (Pathfinder) and catch Abathur, who is easy to kill when found alone. Only when Genji takes Pathfinder.
- TheoryAbathur can reveal enemies (Toxic Nest), taking away Genji's stealth. Only when Genji takes Pathfinder.
- TheoryAbathur's stun (Slapathur) can stop Genji in the middle of a dive. Only when Abathur takes Slapathur.
-
Why? 2
- CuratedDive and Sweeping Strike let Illidan reach a hidden Abathur quickly, and Betrayer's Thirst keeps his cooldowns rolling on a target whose only escape is Deep Tunnel.via Dive, Sweeping Strike, Betrayer's Thirst, Deep Tunnel
- TheoryIllidan can dive onto Abathur, whose small Health pool rarely survives a committed dive.
-
Why? 5
- CuratedNova scouts the bushes behind the lines from stealth and deletes Abathur's 685-health body with Snipe and a few basic attacks before he can react.via Permanent Cloak, Snipe, Pinning Shot
- TheoryNova can approach unseen (Permanent Cloak, Ghost Protocol) and catch Abathur, who is easy to kill when found alone.
- TheoryNova's burst (Snipe, Pinning Shot) can delete Abathur's small Health pool before help arrives.
- TheoryAbathur can reveal enemies (Toxic Nest), taking away Nova's stealth.
- TheoryAbathur's area damage (Locust Strain) clears Nova's summoned units quickly.






View 9 more
- Valeera Score 74 Curated Vanish lets Valeera approach unseen, and her stealth opener locks Abathur in place long enough for Sinister Strike and Eviscerate to finish a body with almost no health.
6 more reasons
- Valeera can approach unseen (Vanish) and catch Abathur, who is easy to kill when found alone.
- Valeera can dive onto Abathur, whose small Health pool rarely survives a committed dive.
- Valeera's burst can delete Abathur's small Health pool before help arrives.
- Valeera's area damage (Sinister Strike, Blade Flurry) clears Abathur's summoned units quickly.
- Abathur can reveal enemies (Toxic Nest), taking away Valeera's stealth.
- Abathur's stun (Slapathur) can stop Valeera in the middle of a dive. Only when Abathur takes Slapathur.
- Kel'Thuzad Score 77 Theory Kel'Thuzad's burst can delete Abathur's small Health pool before help arrives.
3 more reasons
- Kel'Thuzad's map-wide reach (Shadow Fissure) helps answer Abathur's side-lane pressure. Only when Kel'Thuzad takes Shadow Fissure.
- Kel'Thuzad's area damage (Death and Decay, Frost Nova) clears Abathur's summoned units quickly.
- Kel'Thuzad clears waves quickly (Death and Decay, Frost Nova), so Abathur's lane pressure buys less.
- Kerrigan Score 77 Theory Kerrigan can dive onto Abathur, whose small Health pool rarely survives a committed dive.
3 more reasons
- Kerrigan's burst can delete Abathur's small Health pool before help arrives.
- Kerrigan clears waves quickly (Impaling Blades, Primal Grasp), so Abathur's lane pressure buys less.
- Kerrigan's area damage (Impaling Blades, Primal Grasp) clears Abathur's summoned units quickly.
- Ragnaros Score 75 Theory Ragnaros's map-wide reach (Molten Core, Heroic Difficulty) helps answer Abathur's side-lane pressure.
2 more reasons
- Ragnaros's area damage (Empower Sulfuras, Blast Wave) clears Abathur's summoned units quickly.
- Ragnaros clears waves quickly (Empower Sulfuras, Blast Wave), so Abathur's lane pressure buys less.
- Hanzo Score 74 Theory Hanzo's burst (Storm Bow, Sonic Arrow) can delete Abathur's small Health pool before help arrives.
3 more reasons
- Hanzo's map-wide reach (Dragon's Arrow) helps answer Abathur's side-lane pressure. Only when Hanzo takes Dragon's Arrow.
- Hanzo's area damage (Serrated Arrows, Ignore All Distractions) clears Abathur's summoned units quickly. Only when Hanzo takes Serrated Arrows or Ignore All Distractions.
- Hanzo clears waves quickly (Serrated Arrows, Ignore All Distractions), so Abathur's lane pressure buys less. Only when Hanzo takes Serrated Arrows or Ignore All Distractions.
- Maiev Score 73 Theory Maiev can dive onto Abathur, whose small Health pool rarely survives a committed dive.
2 more reasons
- Maiev's area damage (Fan of Knives, Spirit of Vengeance) clears Abathur's summoned units quickly.
- Maiev clears waves quickly (Fan of Knives, Spirit of Vengeance), so Abathur's lane pressure buys less.
- Qhira Score 73 Theory Qhira can dive onto Abathur, whose small Health pool rarely survives a committed dive.
2 more reasons
- Qhira's area damage (Carnage, Revolving Sweep) clears Abathur's summoned units quickly.
- Qhira clears waves quickly (Carnage, Revolving Sweep), so Abathur's lane pressure buys less.
- Junkrat Score 71 Theory Junkrat's burst (Concussion Mine, Steel Trap) can delete Abathur's small Health pool before help arrives.
2 more reasons
- Junkrat's area damage (Frag Launcher, Concussion Mine) clears Abathur's summoned units quickly.
- Junkrat clears waves quickly (Frag Launcher, Concussion Mine), so Abathur's lane pressure buys less.
- Kael'thas Score 71 Theory Kael'thas's burst (Flamestrike, Pyroblast) can delete Abathur's small Health pool before help arrives.
2 more reasons
- Kael'thas's area damage (Flamestrike, Living Bomb) clears Abathur's summoned units quickly.
- Kael'thas clears waves quickly (Flamestrike, Living Bomb), so Abathur's lane pressure buys less.
43 more below the bar
Weaker mechanical edges
Generic rule matches with no hand-written matchup behind them: scoring under 65, or past the 8 strongest.
- Orphea Score 71 Theory Orphea's burst (Chomp, Dread) can delete Abathur's small Health pool before help arrives.
- Fenix Score 70 Theory Fenix's map-wide reach (Planet Cracker) helps answer Abathur's side-lane pressure. Only when Fenix takes Planet Cracker.
- Artanis Score 69 Theory Artanis can dive onto Abathur, whose small Health pool rarely survives a committed dive.
- Azmodan Score 69 Theory Azmodan's map-wide reach (Demon Lieutenant) helps answer Abathur's side-lane pressure.
- Mephisto Score 67 Theory Mephisto can dive onto Abathur, whose small Health pool rarely survives a committed dive.
- Sgt. Hammer Score 67 Theory Sgt. Hammer's map-wide reach (Blunt Force Gun) helps answer Abathur's side-lane pressure. Only when Sgt. Hammer takes Blunt Force Gun.
- Xal'atath Score 67 Theory Xal'atath's burst can delete Abathur's small Health pool before help arrives.
- Probius Score 65 Theory Probius's burst (Warp Rift, Disruption Pulse) can delete Abathur's small Health pool before help arrives.
- Alexstrasza Score 62 Theory Alexstrasza's area damage (Flame Buffet, Wing Buffet) clears Abathur's summoned units quickly.
- Blaze Score 62 Theory Blaze's area damage (Flame Stream, Pyromania) clears Abathur's summoned units quickly.
- Cassia Score 62 Theory Cassia's area damage (Lightning Fury, Blinding Light) clears Abathur's summoned units quickly.
- Cho'gall Score 62 Theory Cho'gall's area damage (Shadowflame, Dread Orb) clears Abathur's summoned units quickly.
- D.Va Score 62 Theory D.Va's area damage (Self-Destruct, Mech Mode) clears Abathur's summoned units quickly.
- Deathwing Score 62 Theory Deathwing's area damage (Incinerate, Onslaught) clears Abathur's summoned units quickly.
- Deckard Score 62 Theory Deckard's area damage (Horadric Cube, Scroll Of Sealing) clears Abathur's summoned units quickly.
- E.T.C. Score 62 Theory E.T.C.'s area damage (Powerslide, Face Melt) clears Abathur's summoned units quickly.
- Garrosh Score 62 Theory Garrosh's area damage (Groundbreaker, Wrecking Ball) clears Abathur's summoned units quickly.
- Gazlowe Score 62 Theory Gazlowe's area damage (Deth Lazor, Xplodium Charge) clears Abathur's summoned units quickly.
- Hogger Score 62 Theory Hogger's area damage (Staggering Blow, Loot Hoard) clears Abathur's summoned units quickly.
- Johanna Score 62 Theory Johanna's area damage (Condemn) clears Abathur's summoned units quickly.
- Kharazim Score 62 Theory Kharazim can dive onto Abathur, whose small Health pool rarely survives a committed dive.
- Leoric Score 62 Theory Leoric's area damage (Skeletal Swing) clears Abathur's summoned units quickly.
- Lúcio Score 62 Theory Lúcio's area damage (Soundwave, Push Off) clears Abathur's summoned units quickly.
- Mal'Ganis Score 62 Theory Mal'Ganis's area damage (Fel Claws, Necrotic Embrace) clears Abathur's summoned units quickly.
- Sonya Score 62 Theory Sonya can dive onto Abathur, whose small Health pool rarely survives a committed dive.
- Stitches Score 62 Theory Stitches's area damage (Shambling Horror) clears Abathur's summoned units quickly.
- The Butcher Score 62 Theory The Butcher can dive onto Abathur, whose small Health pool rarely survives a committed dive.
- Thrall Score 62 Theory Thrall can dive onto Abathur, whose small Health pool rarely survives a committed dive.
- Tyrael Score 62 Theory Tyrael's area damage (El'druin's Might, Smite) clears Abathur's summoned units quickly.
- Yrel Score 62 Theory Yrel's area damage (Vindication, Righteous Hammer) clears Abathur's summoned units quickly.
- Brightwing Score 61 Theory Brightwing's map-wide reach helps answer Abathur's side-lane pressure.
- Tyrande Score 61 Theory Tyrande's map-wide reach helps answer Abathur's side-lane pressure.
- Alarak Score 60 Theory Alarak's burst can delete Abathur's small Health pool before help arrives.
- Chromie Score 60 Theory Chromie's burst (Sand Blast, Dragon’s Breath) can delete Abathur's small Health pool before help arrives.
- Jaina Score 60 Theory Jaina's burst (Cone of Cold, Frostbolt) can delete Abathur's small Health pool before help arrives.
- Li-Ming Score 60 Theory Li-Ming's burst can delete Abathur's small Health pool before help arrives.
- Diablo Score 59 Theory Diablo's map-wide reach (Apocalypse) helps answer Abathur's side-lane pressure. Only when Diablo takes Apocalypse.
- Whitemane Score 59 Theory Whitemane's map-wide reach (Guiding Light) helps answer Abathur's side-lane pressure. Only when Whitemane takes Guiding Light.
- Valla Score 57 Theory Valla's area damage (Monster Hunter) clears Abathur's summoned units quickly. Only when Valla takes Monster Hunter.
- Greymane Score 56 Theory Greymane can dive onto Abathur, whose small Health pool rarely survives a committed dive.
- Nazeebo Score 55 Theory Nazeebo clears waves quickly, so Abathur's lane pressure buys less.
- Rexxar Score 55 Theory Rexxar clears waves quickly (Spirit Swoop, Misha, Charge!), so Abathur's lane pressure buys less.
- Tassadar Score 52 Theory Tassadar's burst (Shock Ray) can delete Abathur's small Health pool before help arrives.
Abathur works well with
Score 1–100 for how well the kits combine
-
Why? 3
- CuratedA Symbiote on a diving Illidan adds Spike Burst and Stab damage to every jump, and Carapace shields keep him alive deep in the enemy team.via Symbiote, Carapace, Spike Burst, Dive, Adrenal Overload, Betrayer's Thirst
- CuratedCarapace shields and heals Illidan mid-dive, and with Adrenal Overload (level 4) the Symbiote also gives him 25% Attack Speed, which speeds up Betrayer's Thirst's cooldown reduction.
- TheoryAbathur's stun (Slapathur) lets Illidan dive onto a target that cannot walk away. Only when Abathur takes Slapathur.
-
Why? 3
- CuratedCarapace shields stack with Whirlwind's lifesteal, so a hatted Sonya can stay in melee range far longer than normal; Soma Transference (level 13) adds a heal for every hero Spike Burst hits.via Carapace, Soma Transference, Whirlwind, Symbiote, Spike Burst, Ancient Spear
- CuratedSymbiote on Sonya adds Spike Burst damage and Carapace shields as she dives in with Ancient Spear, and her large Health pool keeps the Symbiote attached.
- TheoryAbathur's stun (Slapathur) lets Sonya dive onto a target that cannot walk away. Only when Abathur takes Slapathur.
-
Why? 2
- CuratedSymbiote on The Butcher adds Carapace shields and Spike Burst damage as he charges in, and his large Health pool keeps the Symbiote riding along.via Symbiote, Carapace, Spike Burst, Ruthless Onslaught
- TheoryAbathur's stun (Slapathur) lets The Butcher dive onto a target that cannot walk away. Only when Abathur takes Slapathur.
-
Why? 3
- CuratedSymbiote on Zeratul adds Spike Burst damage and Carapace shields as he dives, helping him survive the backline long enough to finish a kill.via Symbiote, Spike Burst, Carapace
- TheoryAbathur's stun (Slapathur) holds targets still for Zeratul's burst. Only when Abathur takes Slapathur.
- TheoryAbathur's stun (Slapathur) lets Zeratul dive onto a target that cannot walk away. Only when Abathur takes Slapathur.
-
Why? 1
- CuratedCarapace keeps Malthael alive while he dives for Soul Rip value, and with Adrenal Overload (level 4) the Symbiote's Attack Speed spreads and refreshes Reaper's Mark faster.via Adrenal Overload, Carapace, Reaper's Mark, Soul Rip
-
Why? 1
- CuratedSymbiote on Tychus adds Carapace shields and Spike Burst while he fights at short range, and Ultimate Evolution, if Abathur takes it, can clone him for a second Minigun.via Symbiote, Carapace, Ultimate Evolution, Minigun




View 8 more
- Varian Score 69 Curated Symbiote on a Twin Blades Varian adds shields and Spike Burst while he attacks, and Ultimate Evolution, if Abathur takes it, can copy his high basic-attack damage. Only when Varian takes Twin Blades of Fury (level 4).
1 more reason
- Varian can protect Abathur's fragile body when the enemy hunts it.
- Valla Score 60 Curated Ultimate Evolution clones Valla with 20% bonus attack damage, giving the team a second basic-attack carry whose Hatred stacks ramp up just like the original. Only when Abathur takes Ultimate Evolution (level 10).
- Zagara Score 60 Curated Locusts and Zagara's summons push lanes together, and Symbiote on Zagara adds shields and damage while she sieges.
- Brightwing Score 69 Theory Brightwing has map-wide reach while Abathur pressures a side lane.
1 more reason
- Brightwing can protect Abathur's fragile body when the enemy hunts it.
- Alarak Score 67 Theory Alarak can protect Abathur's fragile body when the enemy hunts it.
1 more reason
- Abathur's stun (Slapathur) holds targets still for Alarak's burst. Only when Abathur takes Slapathur.
- Murky Score 67 Theory Abathur has map-wide reach while Murky pressures a side lane.
1 more reason
- Abathur's stun (Slapathur) holds targets still for Murky's burst. Only when Abathur takes Slapathur.
- Tassadar Score 67 Theory Tassadar can protect Abathur's fragile body when the enemy hunts it.
1 more reason
- Abathur's stun (Slapathur) holds targets still for Tassadar's burst. Only when Abathur takes Slapathur.
- Diablo Score 65 Theory Diablo can protect Abathur's fragile body when the enemy hunts it.
1 more reason
- Diablo has map-wide reach (Apocalypse) while Abathur pressures a side lane. Only when Diablo takes Apocalypse.
57 more below the bar
Weaker mechanical edges
Generic rule matches with no hand-written matchup behind them: scoring under 65, or past the 8 strongest.
- Kharazim Score 64 Theory Kharazim can protect Abathur's fragile body when the enemy hunts it.
- Hanzo Score 63 Theory Abathur's stun (Slapathur) holds targets still for Hanzo's burst. Only when Abathur takes Slapathur.
- Kel'Thuzad Score 63 Theory Abathur's stun (Slapathur) holds targets still for Kel'Thuzad's burst. Only when Abathur takes Slapathur.
- Genji Score 62 Theory Abathur's stun (Slapathur) holds targets still for Genji's burst. Only when Abathur takes Slapathur.
- Kerrigan Score 62 Theory Abathur's stun (Slapathur) holds targets still for Kerrigan's burst. Only when Abathur takes Slapathur.
- Tracer Score 62 Theory Abathur's stun (Slapathur) holds targets still for Tracer's burst. Only when Abathur takes Slapathur.
- Valeera Score 62 Theory Abathur's stun (Slapathur) holds targets still for Valeera's burst. Only when Abathur takes Slapathur.
- Alexstrasza Score 60 Theory Alexstrasza can protect Abathur's fragile body when the enemy hunts it.
- Ana Score 60 Theory Ana can protect Abathur's fragile body when the enemy hunts it.
- Anduin Score 60 Theory Anduin can protect Abathur's fragile body when the enemy hunts it.
- Anub'arak Score 60 Theory Anub'arak can protect Abathur's fragile body when the enemy hunts it.
- Arthas Score 60 Theory Arthas can protect Abathur's fragile body when the enemy hunts it.
- Auriel Score 60 Theory Auriel can protect Abathur's fragile body when the enemy hunts it.
- Azmodan Score 60 Theory Azmodan has map-wide reach (Demon Lieutenant) while Abathur pressures a side lane.
- Blaze Score 60 Theory Blaze can protect Abathur's fragile body when the enemy hunts it.
- Cassia Score 60 Theory Cassia can protect Abathur's fragile body when the enemy hunts it.
- Chen Score 60 Theory Chen can protect Abathur's fragile body when the enemy hunts it.
- D.Va Score 60 Theory D.Va can protect Abathur's fragile body when the enemy hunts it.
- Deckard Score 60 Theory Deckard can protect Abathur's fragile body when the enemy hunts it.
- Dehaka Score 60 Theory Abathur has map-wide reach while Dehaka pressures a side lane.
- E.T.C. Score 60 Theory E.T.C. can protect Abathur's fragile body when the enemy hunts it.
- Falstad Score 60 Theory Falstad has map-wide reach (Flight) while Abathur pressures a side lane.
- Garrosh Score 60 Theory Garrosh can protect Abathur's fragile body when the enemy hunts it.
- Hogger Score 60 Theory Hogger can protect Abathur's fragile body when the enemy hunts it.
- Johanna Score 60 Theory Johanna can protect Abathur's fragile body when the enemy hunts it.
- Leoric Score 60 Theory Leoric can protect Abathur's fragile body when the enemy hunts it.
- Li Li Score 60 Theory Li Li can protect Abathur's fragile body when the enemy hunts it.
- Lúcio Score 60 Theory Lúcio can protect Abathur's fragile body when the enemy hunts it.
- Mal'Ganis Score 60 Theory Mal'Ganis can protect Abathur's fragile body when the enemy hunts it.
- Malfurion Score 60 Theory Malfurion can protect Abathur's fragile body when the enemy hunts it.
- Medivh Score 60 Theory Medivh can protect Abathur's fragile body when the enemy hunts it.
- Mei Score 60 Theory Mei can protect Abathur's fragile body when the enemy hunts it.
- Ragnaros Score 60 Theory Ragnaros has map-wide reach (Molten Core, Heroic Difficulty) while Abathur pressures a side lane.
- Rehgar Score 60 Theory Rehgar can protect Abathur's fragile body when the enemy hunts it.
- Rexxar Score 60 Theory Rexxar can protect Abathur's fragile body when the enemy hunts it.
- Samuro Score 60 Theory Abathur has map-wide reach while Samuro pressures a side lane.
- Stitches Score 60 Theory Stitches can protect Abathur's fragile body when the enemy hunts it.
- Stukov Score 60 Theory Stukov can protect Abathur's fragile body when the enemy hunts it.
- Sylvanas Score 60 Theory Abathur has map-wide reach while Sylvanas pressures a side lane.
- The Lost Vikings Score 60 Theory Abathur has map-wide reach while The Lost Vikings pressures a side lane.
- Tyrael Score 60 Theory Tyrael can protect Abathur's fragile body when the enemy hunts it.
- Tyrande Score 60 Theory Tyrande has map-wide reach while Abathur pressures a side lane.
- Uther Score 60 Theory Uther can protect Abathur's fragile body when the enemy hunts it.
- Xul Score 60 Theory Abathur has map-wide reach while Xul pressures a side lane.
- Zarya Score 60 Theory Zarya can protect Abathur's fragile body when the enemy hunts it.
- Chromie Score 57 Theory Abathur's stun (Slapathur) holds targets still for Chromie's burst. Only when Abathur takes Slapathur.
- Jaina Score 57 Theory Abathur's stun (Slapathur) holds targets still for Jaina's burst. Only when Abathur takes Slapathur.
- Junkrat Score 57 Theory Abathur's stun (Slapathur) holds targets still for Junkrat's burst. Only when Abathur takes Slapathur.
- Kael'thas Score 57 Theory Abathur's stun (Slapathur) holds targets still for Kael'thas's burst. Only when Abathur takes Slapathur.
- Li-Ming Score 57 Theory Abathur's stun (Slapathur) holds targets still for Li-Ming's burst. Only when Abathur takes Slapathur.
- Nova Score 57 Theory Abathur's stun (Slapathur) holds targets still for Nova's burst. Only when Abathur takes Slapathur.
- Orphea Score 57 Theory Abathur's stun (Slapathur) holds targets still for Orphea's burst. Only when Abathur takes Slapathur.
- Probius Score 57 Theory Abathur's stun (Slapathur) holds targets still for Probius's burst. Only when Abathur takes Slapathur.
- Xal'atath Score 57 Theory Abathur's stun (Slapathur) holds targets still for Xal'atath's burst. Only when Abathur takes Slapathur.
- Fenix Score 56 Theory Fenix has map-wide reach (Planet Cracker) while Abathur pressures a side lane. Only when Fenix takes Planet Cracker.
- Sgt. Hammer Score 56 Theory Sgt. Hammer has map-wide reach (Blunt Force Gun) while Abathur pressures a side lane. Only when Sgt. Hammer takes Blunt Force Gun.
- Whitemane Score 56 Theory Whitemane has map-wide reach (Guiding Light) while Abathur pressures a side lane. Only when Whitemane takes Guiding Light.
Spot a wrong or missing matchup? Suggest a correction with the mechanical reason; accepted notes land in the theory layer for everyone.
Maps
Best maps for Abathur
Score 1–100 from how the kit fits each map's layout and objective (50 = neutral)
-
Why? 4
- TheoryAbathur's map-wide reach offsets Blackheart's Bay's long rotations.
- TheoryAbathur can siege structures (Locust Strain, Slapathur), which adds to Blackheart's Bay's objective pressure.
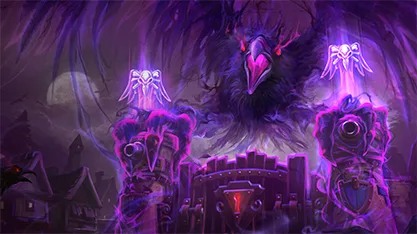
- TheoryBlackheart's Bay has three lanes for Abathur to pressure while the team holds the objective.
- TheoryAbathur can reach channelling enemies quickly to contest Blackheart's Bay's objective.
-
Why? 4
- TheoryAbathur's map-wide reach offsets Cursed Hollow's long rotations.
- TheoryCursed Hollow has three lanes for Abathur to pressure while the team holds the objective.
- TheoryAbathur can reach channelling enemies quickly to contest Cursed Hollow's objective.
- TheoryAbathur can cover ground quickly (Deep Tunnel, Evolve Monstrosity) on Cursed Hollow's large layout.
-
Why? 4
- TheoryAbathur's map-wide reach offsets Dragon Shire's long rotations.
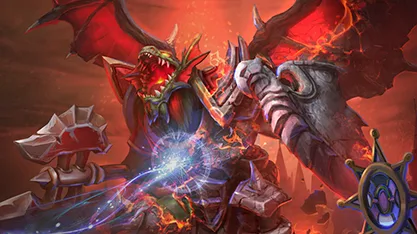
- TheoryDragon Shire has three lanes for Abathur to pressure while the team holds the objective.
- TheoryAbathur can reach channelling enemies quickly to contest Dragon Shire's objective.
- TheoryAbathur's waveclear (Locust Strain) helps hold lanes against Dragon Shire's pushing objective.
-
Why? 4
- TheoryAbathur's map-wide reach offsets Garden of Terror's long rotations.
- TheoryGarden of Terror has three lanes for Abathur to pressure while the team holds the objective.
- TheoryAbathur can cover ground quickly (Deep Tunnel, Evolve Monstrosity) on Garden of Terror's large layout.
- TheoryAbathur's summons (Locust Strain, Locust Brood) add damage to Garden of Terror's neutral objective.
-
Why? 4
- TheoryAbathur's map-wide reach offsets Sky Temple's long rotations.
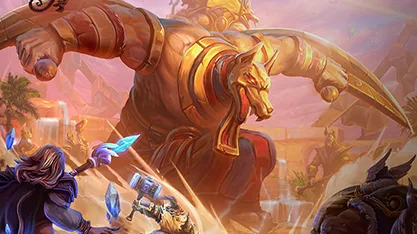
- TheoryAbathur can siege structures (Locust Strain, Slapathur), which adds to Sky Temple's objective pressure.
- TheorySky Temple has three lanes for Abathur to pressure while the team holds the objective.
- TheoryAbathur can cover ground quickly (Deep Tunnel, Evolve Monstrosity) on Sky Temple's large layout.
-
Why? 4
- TheoryAbathur can siege structures (Locust Strain, Slapathur), which adds to Towers of Doom's objective pressure.
- TheoryTowers of Doom has three lanes for Abathur to pressure while the team holds the objective.
- TheoryAbathur can reach channelling enemies quickly to contest Towers of Doom's objective.
- TheoryAbathur's waveclear (Locust Strain) helps hold lanes against Towers of Doom's pushing objective.



View 12 more
- Warhead Junction Score 77 Theory Abathur's map-wide reach offsets Warhead Junction's long rotations.
3 more reasons
- Warhead Junction has three lanes for Abathur to pressure while the team holds the objective.
- Abathur can reach channelling enemies quickly to contest Warhead Junction's objective.
- Abathur can cover ground quickly (Deep Tunnel, Evolve Monstrosity) on Warhead Junction's large layout.
- Alterac Pass Score 69 Theory Alterac Pass has three lanes for Abathur to pressure while the team holds the objective.
2 more reasons
- Abathur's summons (Locust Strain, Locust Brood) add damage to Alterac Pass's neutral objective.
- Abathur's waveclear (Locust Strain) helps hold lanes against Alterac Pass's pushing objective.
- Infernal Shrines Score 69 Theory Infernal Shrines has three lanes for Abathur to pressure while the team holds the objective.
2 more reasons
- Abathur's summons (Locust Strain, Locust Brood) add damage to Infernal Shrines's neutral objective.
- Abathur's waveclear (Locust Strain) helps hold lanes against Infernal Shrines's pushing objective.
- Tomb of the Spider Queen Score 65 Theory Tomb of the Spider Queen has three lanes for Abathur to pressure while the team holds the objective.
1 more reason
- Abathur's waveclear (Locust Strain) helps hold lanes against Tomb of the Spider Queen's pushing objective.
- Volskaya Foundry Score 65 Theory Volskaya Foundry has three lanes for Abathur to pressure while the team holds the objective.
1 more reason
- Abathur's waveclear (Locust Strain) helps hold lanes against Volskaya Foundry's pushing objective.
- Hanamura Temple Score 60 Theory Abathur can siege structures (Locust Strain, Slapathur), which adds to Hanamura Temple's objective pressure.
2 more reasons
- Hanamura Temple has only two lanes, so Abathur's side-lane pressure is easier to answer.
- Abathur's waveclear (Locust Strain) helps hold lanes against Hanamura Temple's pushing objective.
- Battlefield of Eternity Score 55 Theory Battlefield of Eternity has only two lanes, so Abathur's side-lane pressure is easier to answer.
2 more reasons
- Abathur's summons (Locust Strain, Locust Brood) add damage to Battlefield of Eternity's neutral objective.
- Abathur's waveclear (Locust Strain) helps hold lanes against Battlefield of Eternity's pushing objective.
- Braxis Outpost Score 55 Theory Abathur's waveclear (Locust Strain) holds Braxis Outpost's single lane.
- Haunted Mines Score 55 Theory Haunted Mines has only two lanes, so Abathur's side-lane pressure is easier to answer.
2 more reasons
- Abathur's summons (Locust Strain, Locust Brood) add damage to Haunted Mines's neutral objective.
- Abathur's waveclear (Locust Strain) helps hold lanes against Haunted Mines's pushing objective.
- Industrial District Score 55 Theory Abathur's waveclear (Locust Strain) holds Industrial District's single lane.
- Lost Cavern Score 55 Theory Abathur's waveclear (Locust Strain) holds Lost Cavern's single lane.
- Silver City Score 55 Theory Abathur's waveclear (Locust Strain) holds Silver City's single lane.
Talents
Talents by level
-
Level 1
-

Pressurized Glands W
Increases the range of Symbiote's Spike Burst by 25% and decreases the cooldown by 1 second.
-

Envenomed Nest W
Toxic Nests deal 75% more damage over 3 seconds and reduce the Armor of enemy Heroes hit by 15 for 4 seconds.
-

Reinforced Carapace E
Increase the Shield amount of Carapace by 40%.
-

Locust Brood Active
Activate to spawn 3 Locusts at a nearby location.
-
-
Level 4
-

Adrenal Overload Q
Heroic Symbiote hosts gain 25% increased Attack Speed.
-

Needlespine Q
Increases the damage and range of Symbiote's Stab by 20%.
-
Prolific Dispersal W
Increase the duration of Toxic Nests by 45 seconds, reduce its cooldown by 2 seconds, and add 2 additional charges.
-

Slapathur E
Abathur’s Basic Attacks deal 350% additional damage and Stun non-Elite enemies and disable Structures for 1.5 seconds. The same Hero or Structure can only be Stunned or disabled once every 6 seconds.
-
-
Level 7
-
Vile Nest W
Toxic Nests Slow enemy Movement Speed by 40% for 2.5 seconds.
-
Networked Carapace E
Using Symbiote's Carapace also applies an untalented Carapace Shield to all nearby allied Heroes, Minions, and Mercenaries.
-

Calldown: MULE Active
Activate to calldown a Mule that repairs Structures, one at a time, near target point for 40 seconds, healing for 90 Health every 1 second.
-
-
Level 10
-

Ultimate Evolution Heroic
Clone target allied Hero and control it for 20 seconds. Abathur has perfected the clone, granting it 20% Spell Power, 20% bonus Attack Damage, and 10% bonus Movement Speed. Cannot use their Heroic Ability.
-

Evolve Monstrosity Heroic Quest
Turn an allied Minion or Locust into a Monstrosity. When enemy Minions near the Monstrosity die, it gains 2% Health and 2% Basic Attack damage, stacking up to 40 times. The Monstrosity can be healed by Carapace and has the ability to Burrow to a visible location every 80 seconds. Using Symbiote on the Monstrosity allows Abathur to control it, in addition to Symbiote's normal benefits. This Ability can be reactivated to automatically cast Symbiote on his Monstrosity.
-
-
Level 13
-
Spatial Efficiency Q
Symbiote's Stab gains 1 additional charge and its cooldown is reduced by .5 seconds.
-
Soma Transference W
Symbiote's Spike Burst heals the host for 64 (+4% per level) Health per enemy Hero hit.
-
Bombard Strain Trait
Locust's Basic Attacks become a long-range siege attack and they now lose health 40% more slowly.
-
-
Level 16
-
Envenomed Spikes W
Abathur's Symbiote's Spike Burst also Slows enemy Movement Speed by 40% for 2 seconds.
-
Adrenaline Boost E
Symbiote's Carapace increases the Movement Speed of the target by 40% for 3.5 seconds.
-
Volatile Mutation Heroic
Ultimate Evolution clones and Monstrosities deal 137 (+4% per level) damage to nearby enemies every 3 seconds and when they die. Enemy Heroes hit heal the clone or Monstrosity for 100% of the damage dealt.
-
Survival Instincts Trait
Reduce damage taken by Locusts from non-Heroes by 50% and increase their damage by 60%.
-
-
Level 20
-
Evolutionary Link Heroic
Increase the duration of Ultimate Evolution by 50%. As long as the Ultimate Evolution is alive, the original target of the clone gains a Shield equal to 35% of their maximum Health. Refreshes every 5 seconds.
-
Evolution Complete Heroic
Increase Monstrosity's Basic Attack damage by 100%.
-
Hivemind Q
Symbiote creates an additional Symbiote on a nearby allied Hero. This Symbiote mimics the commands of the first, but does half damage and Shielding.
-

Locust Nest Active
Activate to create a nest that periodically spawns Locusts. Only one Locust Nest can be active at a time.
-
Abilities and mechanics
-
Locust Strain D Trait
Spawns a Locust to attack down the nearest lane every 15 seconds. Locusts heal for 20% of the damage they deal, and regain 20% of their Maximum health when a nearby minion dies. Locusts lose health over 17 seconds, have 225 (+4% per level) health and deal 36 (+4% per level) damage with each Basic Attack, dealing 100% bonus damage to enemy non-Heroes.
-
Stab Q Ability
Shoots a spike towards target area that deals 119 (+4% per level) damage to the first enemy it contacts.
-
Symbiote Q Ability
Spawn and attach a Symbiote to a target ally or Structure. While active, Abathur controls the Symbiote, gaining access to new Abilities. The Symbiote is able to gain XP from nearby enemy deaths.
-
Spike Burst W Ability
Deals 120 (+4% per level) damage to nearby enemies.
-
Toxic Nest W Ability
Spawn a mine that becomes active after a short time. Deals 153 (+4% per level) damage and reveals the enemy for 4 seconds. Lasts 90 seconds. Stores up to 3 charges.
-
Carapace E Ability
Shields the assisted ally for 150 (+4% per level). Allied Heroes are healed for 22 (+4% per level) Health per second while the Shield is active. Lasts for 6 seconds.
-
Evolve Monstrosity R Heroic
Turn an allied Minion or Locust into a Monstrosity. When enemy Minions near the Monstrosity die, it gains 2% Health and 2% Basic Attack damage, stacking up to 40 times. The Monstrosity can be healed by Carapace and has the ability to Burrow to a visible location every 80 seconds. Using Symbiote on the Monstrosity allows Abathur to control it, in addition to Symbiote's normal benefits. This Ability can be reactivated to automatically cast Symbiote on his Monstrosity.
-
Ultimate Evolution R Heroic
Clone target allied Hero and control it for 20 seconds. Abathur has perfected the clone, granting it 20% Spell Power, 20% bonus Attack Damage, and 10% bonus Movement Speed. Cannot use their Heroic Ability.
-

Deep Tunnel Z Mount
Quickly tunnel to a visible location.
Mechanics tags
What the theory layer reads from Abathur's kit. Each tag shows the ability or talent text that produced it; curated notes cover play-style traits the text cannot show.
Crowd control
Defense and mobility
Damage and macro
Play-style traits
Patch history
- Heroes of the Storm Live Patch Notes, 28 Sep 2026 Patch Nerfed
1 nerf, 1 other change
- NerfBombard Strain: Health decay reduction 50% → 40%Level 13
- ChangeSurvival Instincts: Effect changed; game data: damage 100% → 50% (see Blizzard's notes)Level 16
-
1 nerf, 1 other change
- NerfBombard Strain: Health decay reduction 50% → 40%Level 13
- ChangeSurvival Instincts: Effect changed (see Blizzard's notes)Level 16
-
1 buff, 3 nerfs, 6 other changes
- NerfLocust Strain: Health 350 → 225Base
- ChangeLocust Strain: 2 effects removed (see Blizzard's notes)Base
- ChangeLocust Strain: 2 effect changes (see Blizzard's notes)Base
- NerfLocust Strain: Locust damage 58 → 36Base
- BuffEnvenomed Nests: Armor reduction 10 → 15Level 1
- ChangeLocust Brood: Effect changed (see Blizzard's notes)Level 1
- NerfLocust Brood: Cooldown 45 s → 75 sLevel 1
- ChangeSlapathur: New effect (see Blizzard's notes)Level 4
- ChangeEvolve Monstrosity: 2 effect changes (see Blizzard's notes)Level 10
- ChangeSurvival Intincts: Effect changed (see Blizzard's notes)Level 16
-
2 buffs, 2 nerfs, 5 other changes
- NerfSpawn Locust: Health 350 → 225Base
- ChangeSpawn Locust: Effect changed (see Blizzard's notes)Base
- BuffEnvenomed Nests: Armor reduction 10 → 15Level 1
- ChangeLocust Brood: Effect changed (see Blizzard's notes)Level 1
- NerfLocust Brood: Cooldown 45 s → 75 sLevel 1
- ChangeSlapathur: New effect (see Blizzard's notes)Level 4
- ChangeEvolve Monstrosity: 2 effect changes (see Blizzard's notes)Level 10
- ChangeSurvival Intincts: Effect changed (see Blizzard's notes)Level 16
- BuffSurvival Intincts: Health bonus 100% → 200%Level 16
- Heroes of the Storm Live Patch Notes, 30 Sep 2025 Patch Buffed
1 buff
- BuffLocust damage +25%Base
Game-data changes between builds
Detected by comparing the game files of consecutive builds, including silent changes.
-
2.55.17.98025 → 2.57.0.98285
- Bombard Strain health (level 13): 50% → 40%
- Survival Instincts text (level 16): Increases Locust's Health by 100% and damage by 60%. → Reduce damage taken by Locusts from non-Heroes by 50% and increase their damage by 60%.
- Survival Instincts damage (level 16): 100% → 50%
Guides and links
Guides and builds
Reference and esports
Whetstone links to these sites and never copies their write-ups; credit and copyright stay with their authors.